April 13, 2017

High Availability (HA), Session Replicated, Multi-VM Payara Cluster - The (Almost) Complete Guide

Abstract

While researching how to create a high availability (HA), session replicated, multi-machined Payara/GlassFish cluster I discovered I couldn’t find everything I needed in a single reference. I assumed this would be a common need and easy to find. Unfortunately my assumption was wrong. So the purpose of this post is to give a complete end-to-end example of a high availability (HA), session replicated, multi-machined Payara clustering. But I also say (almost) because, as with any technology, I’m sure there are other ways to do this. The way described in this post is from my research.

Requirements

I did all of the work for this post using the following major technologies. You may be able to do the same thing with different technologies or versions, but no guarantees.

  • Java SE 8 - OpenJDK 1.8.0_91
  • Java EE 7 - Payara 4.1.1.163
  • VirtualBox 5.1.6
  • Lubuntu 16.04
  • Nginx 1.10.0
  • NetBeans 8.2
  • Maven 3.0.5 (Bundled with NetBeans)

Definitions

Throughout this post, the following words will have these specific meanings. Nothing here that requires a lawyer, but it’s good to make sure the definitions are set.

Machine: The word machine refers to something which is running its own operating system. It can be either real hardware like a laptop, desktop, server, or raspberry pi. Or it can be a VM run on something like VirtualBox or VMWare. Or it can be something that looks like a machine such as a Docker container.

Cluster: A cluster is a collection of GlassFish Server instances that work together as one logical entity. A cluster provides a runtime environment for one or more Java Platform, Enterprise Edition (Java EE) applications (Administering GlassFish Server Clusters, n.d.)

Cluster Node: A cluster node represents a host on which the GlassFish Server software is installed. A node must exist for every host on which GlassFish Server instances reside (Administering GlassFish Server Nodes, n.d.)

Cluster Node Instance: A GlassFish Server instance is a single Virtual Machine for the Java platform (Java Virtual Machine or JVM machine) on a single node in which GlassFish Server is running. The JVM machine must be compatible with the Java Platform, Enterprise Edition (Java EE). (Administering GlassFish Server Instances, n.d.)

Architecture

Since this post describes a Payara cluster across multiple machines, it’s important to know what role each machine will play in the cluster. It’s not wise to start installing software across multiple machines without a plan. This section will give an overview of:

  1. The Architecture Diagram
  2. Machine Roles
  3. Machine Network Configuration
  4. Machine User Configuration
  5. Machine Software Installation

How the machines actually get up and running will not be covered in this post. This is a task left up to you. Some options are: real hardware (Raspberry Pi), virtual machines (Virtual Box), containers (Docker), or the cloud (AWS). If you already have machines up and running, configured, and ready to go, you can skip this section and jump directly to Cluster Creation.

Architecture Diagram

Figure 1 shows a simple architecture diagram for the simple example application being built for this post. But even though it’s simple, it’s important to have. It prevents randomly installing software on machines until you “get it right”. Also, an important word being used here is simple. This architecture contains the minimal pieces needed for this example; it is by no means comprehensive or production ready. So, with that in mind, the next thing to do is to look at the pieces of this architecture in more detail.

Figure 1 - “Zone S” Diagram

Figure 1 - Zone S Diagram
Figure 1 - “Zone S” Diagram

Zone: S All machines in a network should be assigned a zone. A zone groups together machines performing a similar function and also defines how machines between zones communicate with each other. This example shows Zone S. This zone will be for machines supporting application services.

srv[N].internal.dev The blue boxes represent machines in the zone. Each machine in the zone should have a clearly defined role, and, it’s best to not have a machine take on too many roles. The machines for this zone are named srv[N].internal.dev. The srv indicates the machine is a service machine part of Zone S. The [N] uniquely identifies the machine. Finally, the domain .internal.dev indicates this is a machine accessed internally within a development environment. The role of each machine is covered in the Machine Roles section.

Cluster The orange box represent a cluster within the zone. The cluster will be built with Payara. All machines participating in the cluster should be represented within the box.

Cluster Administrator, Cluster Instance, Load Balancer The yellow boxes represent what’s running on the machine. The role of the machine determines what runs on it. Next, you can look at the roles of the machines.

Machine Roles

So, what’s running on each machine in Zone S? Referring back to Figure 1, the machine roles are as follows:

  1. srv01.internal.dev This machine has two roles. The first role is the Payara DAS for administering the cluster. The DAS is strictly dev-ops and internal-use only. It should not be accessible outside the zone. Also, as the DAS, no Java EE applications should be deployed to it. The second role is the NGINX load balancer. The load balancer is the entry point into Zone S when applications need to access the services deployed to the cluster in that zone.
  2. srv02.internal.dev This machine is a node in the Payara cluster. As shown, the node contains 2 instances.
  3. srv03.internal.dev This machine is a node in the Payara cluster. As shown, the node contains 2 instances.

Now that it’s clear the role of each machine, the next thing to look at is communication between the machines.

Machine Network Configuration

The names srv01, srv02 and srv03 will be the short hostnames of the machines. The contents of /etc/hostname on each machine will have this name. Here is the hostname for srv01:

$ cat /etc/hostname 
srv01

.internal.dev is the domain for these machines. The machines should be able to communicate with each other by either short hostname or by fully-qualified hostname.

NOTE This domain - .internal.dev - will be critical later to properly configure the WAR for high-availability session replication across the cluster.

The easiest way to do this is through /etc/hosts. Configure /etc/hosts (on all the machines in the zone) to contain both short hostnames and fully-qualified hostnames.

$ cat /etc/hosts
127.0.0.1  localhost
10.0.2.16  srv01.internal.dev srv01
10.0.2.17  srv02.internal.dev srv02
10.0.2.18  srv03.internal.dev srv03

A simple ssh test should be used to verify communication between all the machines. Don’t skip this verification. Payara will use SSH for communication so it is best to verify and troubleshoot it now before Payara attempts to use it. I’ll leave the details for doing this test to you.

Now that all the machines can communicate to each other, the next thing to look at are Linux user accounts on the machines. Not too exciting, but very important.

Machine User Configuration

Each machine will need a payara user with a home directory at /home/payara. Thepayara user is used to run Payara. Nothing should be running as root. Simple enough.

Now that you got the basics of the machine configuration out of the way, it is time to start creating the Payara cluster.

Cluster Creation

Payara makes it easy to create a cluster. When using separate machines (verses typical examples which use the same machine for everything) there are a few additional steps. This section will give an overview of:

  1. Payara Installation
  2. Payara Domain Startup
  3. Payara DAS Security Configuration
  4. Payara Network Verification
  5. Cluster Creation
  6. Cluster Node Creation
  7. Cluster Node Instance Creation
  8. Cluster Startup
  9. Cluster Multicast Verification

This section is strictly focused on creating and configuring the cluster. This means that after reading this section you will have a cluster but it doesn’t mean your application is ready for high-availability and session replication. WAR Configuration will be discussed in the next section. It’s time to start building the cluster.

Payara Installation

Payara installation is nothing more than downloading the ZIP file and unzipping it. Of course go to Payara and find the download page. This post used Payara 4.1.1.163. It’s time to install Payara on all the machines in the zone.

  • Download Payara 4.1.1.163
  • Unzip Payara in /home/payara. This will create /home/payara/payara41.
  • Create a symlink $ln -s payara41 active
  • Put the Payara bin directories onto the payara Linux users’ $PATH. Add the following line to /home/payara/.bashrc:
export PATH=/home/payara/active/bin:/home/payara/active/glassfish/bin:$PATH

Done! Simple enough. Next see if the Payara domain can start.

Payara Domain Startup

Use the asadmin tool to start the Payara domain. Execute the following command on srv01.internal.dev.

payara$ asadmin start-domain domain1

If all goes well, the domain will start. Verify it’s up and running by browsing to http://localhost:4848. Payara’s default configuration has no username/password protecting the DAS so you should get right in. Now that the DAS is running, the next thing to do is some security configuration.

Payara DAS Security Configuration

Now it’s time to configure some security that’s needed for communication between the machines in the cluster. All of these commands are executed on srv01.internal.dev.

NOTE All this configuration can also be done with the Payara GUI admin application http://localhost:4848 but that’s no fun! Command line is much for fun and hopefully allows automation.

The asadmin password Change the default Payara asadmin password. When executing this command for the first time, remember Payara has no default username/password so when prompted for the password, leave it blank. Execute the following command on srv01.internal.dev:

payara@srv01$ asadmin change-admin-password
Enter admin user name [default: admin]>admin
Enter the admin password>        // Keep this blank when executing this for the first time
Enter the new admin password>        // Create a new password
Enter the new admin password again>  // Enter new password again

Restart the domain to make sure the changes are picked up. Execute the following command on srv01.internal.dev:

payara@srv01$ asadmin restart-domain domain1

Now verify the username/password by using asadmin to login to the DAS. The following command will login to the DAS and after login the asadmin command can be executed without requiring the username/password to be entered every time. This is a convenience, but of course a security risk. To login, execute the following command on srv01.internal.dev:

payara@srv01$ asadmin login
Enter admin user name [Enter to accept default]> admin
Enter admin password> *******

Login information relevant to admin user name [admin] for host [localhost] and admin port [4848] stored at [/home/payara/.gfclient/pass] successfully. Make sure that this file remains protected. Information stored in this file will be used by administration commands to manage associated domain.

Command login executed successfully.

Secure admin Now you want to enable secure communication within the cluster. This basically means the Payara DAS will communicate with the cluster instances securely. This step isn’t necessary, but almost always a nice to have. Execute the following command on srv01.internal.dev:

payara@srv01$ asadmin enable-secure-admin

Restart the domain to make sure the changes are picked up. Execute the following command on srv01.internal.dev:

payara@srv01$ asadmin restart-domain domain1

That’s it for security configuration. The next thing to do is to validate communication from the machines in the Zone to the DAS before attempting to start creating the cluster.

Payara DAS Communication Verification

Try very hard not to skip this step. Most want to get right to cluster building and skip verification steps. This may save a little time, but, if something isn’t working properly it is easier to troubleshoot the problem in the verification step. So far, all work to start and configure the DAS has been on srv01. Now verify machines srv02 and srv03 are able to communicate with the DAS on srv01.

Execute the following on srv02.internal.dev and verify result as shown.

payara@srv02$ asadmin --host srv01 --port 4848 list-configs
Enter admin user name>  admin
Enter admin password for user "admin"> 
server-config
default-config
Command list-configs executed successfully.

Execute the following on srv03.internal.dev and verify result as shown.

payara@srv03$ asadmin --host srv01 --port 4848 list-configs
Enter admin user name>  admin
Enter admin password for user "admin"> 
server-config
default-config
Command list-configs executed successfully.

Successful execution on srv02 and srv03 will verify those machines can successfully communication with the DAS on srv01. Now that this has been verified, it’s time to create the cluster.

Cluster Creation

Now the cluster is going to be created. For this example, the cluster will be ingeniously named c1. In general, the cluster should be named appropriately, however, c1 will work well for this example. Execute the following on srv01.internal.dev.

payara@srv01$ asadmin create-cluster c1
Command create-cluster executed successfully.

That’s it! Pretty anti-climatic huh? The cluster is there, but nothing is in it. It is now time to fill the cluster with nodes. A cluster isn’t very useful without nodes.

Cluster Node Creation

The cluster nodes will be on machines srv02 and srv03. However, the commands to create the nodes are executed on srv01. The asadmin tool, when executed on srv01, will uses ssh to transfer the necessary files to srv02 and srv03. For convenience, first create a temporary password file to make SSH easier.

Temporary password file Recall that a payara Linux user was created on each of the machines. This is a normal Linux user which runs Payara to avoid running Payara as root. The temporary password file holds the unencrypted password of the payara Linux user on srv02 and srv03. It’s assumed the Linux password for the payara user is the same on all the machines. If this is not the case, then the temporary password file will need to be updated with the correct password for the payara user on machine srv[N] before an attempt is made to create a node on srv[N].

NOTE RSA/DSA key files can also be used. Refer to the create-node-ssh documentation for more info. http://docs.oracle.com/cd/E18930_01/html/821-2433/create-node-ssh-1.html#scrolltoc

Create cluster node on srv02 To create a node on srv02, execute the following command on srv01.internal.dev.

payara@srv01$ echo "AS_ADMIN_SSHPASSWORD=[clear_text_password_of_payara_usr_on_srv02]" > /home/payara/password

payara@srv01$ asadmin create-node-ssh --nodehost **srv02.internal.dev** --sshuser payara --passwordfile /home/payara/password srv02-node

Create cluster node on srv03 To create a node on srv03, execute the following command on srv01.internal.dev.

payara@srv01$ echo "AS_ADMIN_SSHPASSWORD=[clear_text_password_of_payara_usr_on_srv03]" > /home/payara/password

payara@srv01$ asadmin create-node-ssh --nodehost **srv03.internal.dev** --sshuser payara --passwordfile /home/payara/password srv03-node

Delete temporary password file After all the nodes are created, the temporary password file is no longer needed. It can be deleted at this point. Of course if more machines are added to the cluster and more nodes are needed, another temporary password file can be easily created.

Payara@srv01$ rm /home/payara/password

So now you got a cluster and nodes. Nodes are great. But nodes can’t do anything without instances. It’s the instances on the nodes that are able to run applications; it’s the actual Payara instance. So now it’s time to make some cluster node instances.

Cluster Node Instance Creation

Creating a node instance is basically creating Payara instances on the nodes. A node can have many instances on it. It all depends on the resources of the machine. The node instances will be created in the nodes on srv02 and srv03. However, the commands to create the node instances are executed on srv01. The asadmin tool, when executed on srv01, will create the node instances on srv02 and srv03.

Create node instances on srv02 Create 2 node instances on srv02. The node instances will be called srv02-instance-01 and srv02-instance-02. Execute the following command on srv01.internal.dev:

payara@srv01&$ asadmin create-instance --cluster c1 --node srv02-node srv02-instance-01

Command _create-instance-filesystem executed successfully.
Port Assignments for server instance srv02-instance-01: 
.....
The instance, srv02-instance-01, was created on host srv02
Command create-instance executed successfully.
payara@srv01$ asadmin create-instance --cluster c1 --node srv02-node srv02-instance-02

Command _create-instance-filesystem executed successfully.
Port Assignments for server instance srv02-instance-02: 
.....
The instance, srv02-instance-02, was created on host srv02
Command create-instance executed successfully.

If, after executing these commands, the message “Command create-instance executed successfully” is printed to the console then it is a pretty safe bet that everything worked OK. However, you should verify just to be sure. The verification process is done on srv02 and srv03. Successful verification means finding the /nodes directory. Execute the following on srv02.internal.dev.

payara@srv02$ cd /home/payara/active/glassfish
payara@srv02$ ls
bin  common  config  domains  legal  lib  modules  nodes  osgi

Create node instances on srv03 Create 2 node instances on srv03. Do everything exactly the same as in the previous heading but use srv03 instead of srv02.

There are now 4 Payara instances…

  1. srv02-instance-01
  2. srv02-instance-02
  3. srv03-instance-01
  4. srv03-instance-02

spread across 2 nodes…

  1. srv02-node
  2. srv03-node

on 2 different machines…

  1. srv02
  2. srv03

on 1 logical Payara cluster

  1. c1

Now, start everything up!

Cluster Startup

Starting the cluster c1 is really very easy. This is done from the srv01 machine and as the DAS starts all of the cluster instances, watch the console to make sure all 4 of them are started. Execute the following command on srv01.internal.dev.

payara@srv01$ asadmin start-cluster c1
0%: start-cluster: Executing start-instance on 4 instances.
Command start-cluster executed successfully.

After the cluster is running, verify the cluster is running by listing the running clusters in the DAS. Also verify the node instances are running by listing the instances in the DAS Execute the following commands on srv01.internal.dev.

payara@srv01$ asadmin list-clusters
c1 running
Command list-clusters executed successfully.
payara@srv01$ asadmin list-instances
srv02-instance-01   running
srv02-instance-02   running
srv03-instance-01   running
srv03-instance-02   running
Command list-instances executed successfully.

Congratulations! You now have a nice little 4 instance cluster. Now it’s time to deploy applications to it right? Wrong! Before deploying applications, it’s important to verify the multi-cast network communication between the nodes is working property to allow HttpSessions to be replicated across the cluster. Verify the multi-cast network communication next.

Cluster Multi-cast Verification

The whole point of having a cluster is to have a high-availability, session-replicated application. If one instance has a problem, another instance in the cluster (possibly on a different node) will take over seamlessly. But in order for this to actually happen, the cluster instances must be able to successfully communicate with each other. Payara has the validate-multicast tool to test this. However, the trick is in how to run validate-multicast. In order to run successfully, validate-multicast must be run on BOTH srv02 and srv03 AT THE SAME TIME! Execute the following on srv02.internal.dev AND srv03.internal.dev AT THE SAME TIME (Hafner, 2011)!

srv02.internal.dev Execute the following on srv02.internal.dev:

payara@srv02$ asadmin validate-multicast
Will use port 2048
Will use address 228.9.3.1
Will use bind interface null
Will use wait period 2,000 (in milliseconds)

Listening for data...
Sending message with content "srv02" every 2,000 milliseconds
Received data from srv02 (loopback)
Received data from srv03
Exiting after 20 seconds. To change this timeout, use the --timeout command line option.
Command validate-multicast executed successfully.

srv03.internal.dev At the same time as srv02.internal.dev, also execute the following on srv03.internal.dev:

payara@srv03$ asadmin validate-multicast
Will use port 2048
Will use address 228.9.3.1
Will use bind interface null
Will use wait period 2,000 (in milliseconds)

Listening for data...
Sending message with content "srv03" every 2,000 milliseconds
Received data from srv03 (loopback)
Received data from srv02
Exiting after 20 seconds. To change this timeout, use the --timeout command line option.
Command validate-multicast executed successfully.

When running both of these commands AT THE SAME TIME Communication between the instances should be successful. On the srv02 machine you should see “Received data from srv03” and on the srv03 machine you should see “Received data from srv02”. This validates that the multi-cast network communication used between the node instances for HttpSession replication is working properly.

Well that’s it! The cluster is now fully configured and up and running on multiple machines. I’m sure you are anxious to get your application deployed to the cluster. So dive in and see how to configure your WAR for a high-availability (HA), session-replicated environment.

WAR Configuration

Once a Payara cluster is configured and up and running, most think any application deployed to the cluster will take advantage of the cluster’s high availability (HA) and session replication. Unfortunately this is not the case. Your application must be developed and configured for a cluster. This section will give an overview of:

  1. HttpSession Serialization
  2. web.xml <distributable/>
  3. glassfish-web.xml cookieDomain

NOTE All of these configurations are needed. If just 1 is skipped, then session replication across the cluster will not work.

The first thing needed for you application is session serialization. This will be covered very briefly next.

Session Serialization

HttpSession serialization is a simple thing but something which most development teams pay very little attention to. Typically, application servers use serialization to replicate sessions across the cluster. If the objects in HttpSession are not able to be serialized, session replication will fail. So make sure ALL objects put into HttpSession are able to be serialized.

Session serialization is a critical configuration. If it is skipped, then session replication across the cluster will not work.

NOTE In a development environment, run your application with a javax.servlet.Filter which attempts to serialize all objects in HttpSession. If you do adequate testing, this should catch any serialization problems.

Now that all the objects in HttpSession can be serialized, the next thing to look at is the web.xml configuration.

web.xml <distributable/>

Page 157 of the Servlet 3.1 specification defines the <distributable/> element for web.xml as “The <distributable/> indicates that this Web application is programmed appropriately to be deployed into a distributed servlet container.” This means <distributable/> must be added to web.xml so Payara knows the application will be running in a cluster and should be handled as such. Listing 1 shows an example.

Listing 1 - Distributable

<?xml version="1.0" encoding="UTF-8"?>
<web-app xmlns="http://xmlns.jcp.org/xml/ns/javaee"
         xmlns:xsi="http://www.w3.org/2001/XMLSchema-instance"
         xsi:schemaLocation="http://xmlns.jcp.org/xml/ns/javaee http://xmlns.jcp.org/xml/ns/javaee/web-app_3_1.xsd"
         version="3.1">
  <display-name>clusterjsp</display-name>
  <distributable/>
  <servlet>
    <display-name>HaJsp</display-name>
    <servlet-name>HaJsp</servlet-name>    
    <jsp-file>/HaJsp.jsp</jsp-file>
  </servlet>
  <servlet>
    <display-name>ClearSession</display-name>
    <servlet-name>ClearSession</servlet-name>    
    <jsp-file>/ClearSession.jsp</jsp-file>
  </servlet>
  <session-config>
    <session-timeout>30</session-timeout>
  </session-config>
  <welcome-file-list>
    <welcome-file>HaJsp.jsp</welcome-file>
  </welcome-file-list>
</web-app>

The <distributable/> element is a critical configuration. If it is missing, then session replication across the cluster will not work.

The <distributable/> element is a configuration that’s needed for all Java EE servers. Payara has some of its own custom configuration as well. The next thing to look at is this server-specific configuration.

glassfish-web.xml cookieDomain

The glassfish-web.xml file is the Payara-specific configuration file for a web application. Unlike web.xml which is applicable to all Java EE servers, glassfish-web.xml only works for GlassFish or Payara EE servers. This means if you are deploying to a different EE server, you may or may not need to find the equivalent configuration for that server.

For Payara, glassfish-web.xml must be updated to add the cookieDomain property. Listing 2 shows the hierarchy of tags to properly set the cookieDomain value. As you can see in listing 2, the value is set to .internal.dev (Hafner, 2011). If you recall, this is the the domain you are using for the cluster architecture.

Listing 2 - cookieDomain

<?xml version="1.0" encoding="UTF-8"?>
<!DOCTYPE glassfish-web-app PUBLIC "-//GlassFish.org//DTD GlassFish Application Server 3.1 Servlet 3.0//EN" "http://glassfish.org/dtds/glassfish-web-app_3_0-1.dtd">
<glassfish-web-app error-url="">
  <session-config>
    **<cookie-properties>
      <property name="cookieDomain" value=".internal.dev"/>
    </cookie-properties>**
  </session-config>
</glassfish-web-app>

This cookieDomain property configuration is important because it allows the JSESSIONID cookie - which is what’s used to track a user’s session across the cluster node instances - to be passed to any cluster node instance on each web browser request. The easiest way see what’s happening here is to explain what happens if the cookieDomain property configuration is missing.

NOTE This is a little sneak preview of what’s to come, but that’s OK.

Suppose the cookieDomain property configuration is missing. A web browser then makes a request to the application running on one of the cluster node instances with the url http://srv02.internal.dev:28080/ferris-clusterjsp. When the application processes the request, it will create a JSESSIONID cookie and the domain value of that cookie will be (by default) the hostname used to access the application which in this case is srv02.internal.dev. Now another request is made to url http://srv03.internal.dev:28080/ferris-clusterjsp. It’s an instance of the cluster so you would expect that instance to find the session that’s already been created. But this won’t happen. It won’t happen because the JSESSIONID cookie was create with the domain value **srv02**.internal.dev so the web browser will not send this cookie on a request to http://**srv03**.internal.dev because the cookie belongs to srv02 and not srv03.

Now suppose the cookieDomain property configuration is configured as in Listing 2. What happens now? Well, a web browser makes a request to the application running on one of the cluster node instances with the url http://srv02.internal.dev:28080/ferris-clusterjsp. This time, however, when the application processes the request, it will create a JSESSIONID cookie and the domain value of that cookie will be the domain you configured it to be in Listing 2 which is .internal.dev. Now another request is made to url http://srv03.internal.dev:28080/ferris-clusterjsp. The web browser will send the JSESSIONID along with this request because the cookie belongs to .internal.dev and the request is going to http://srv03**.internal.dev**.

The cookieDomain property is a critical configuration. If it is missing, or if the domain you are using does not match the cookieDomain value, then session replication across the cluster will not work.

Congratulations. Your web application is configured and ready for deployment to the cluster. Deployment is easy to do, and you’ll do that next.

WAR Deployment

At this point, you’re finally ready to deploy your WAR. Well, not quite. Do you have a WAR? No? Well you’re in luck. The clusterjsp application is popular for testing clusters and session replication. I have my own fork of clusterjsp on my GitHub account which is already configured and ready to deploy to this example cluster. You can download my fork of clusterjsp at https://github.com/mjremijan/ferris-clusterjsp/releases. In this section, you will look at:

  1. The Payara asadmin deploy command
  2. Verifying application deployed correctly across the cluster.

Deploy Command

First you have to download ferris-clusterjsp-1.1.0.0.war from my GitHub account. Next, deployed it to the cluster using the asadmin command. Execute the following on srv01.internal.dev:

$ asadmin deploy --force true --precompilejsp=true --enabled=true --availabilityenabled=true --asyncreplication=true --target c1 --contextroot=ferris-clusterjsp --name=ferris-clusterjsp:1.1.0.0 ferris-clusterjsp-1.1.0.0.war

Application deployed with name ferris-clusterjsp:1.1.0.0.
Command deploy executed successfully.

–force true Forces the webapp to be redeployed even if it has already been deployed.

–precompilejsp=true The ferris-clusterjsp application uses some simple JSP files, so have them precompiled at deployment.

–enabled=true Allows access to the application after it is deployed.

–availabilityenabled=true Allows for high-availability through session replication and passivation. The applies to stateful session beans as well, though those are typically not used much anymore.

–asyncreplication=true Perform session replication across the cluster in a separate asynchronous thread vs. the thread handling the user’s request.

–target c1 Deploy the application to cluster c1

–contextroot=ferris-clusterjsp Set the context root of the application to ferris-clusterjsp. This can also be defined in glassfish-web.xml.

–name=ferris-clusterjsp:1.1.0.0 Set the display name of the application as it appears in the Payara admin console. Typically it’s a good idea to include the version number in display name.

ferris-clusterjsp–1.1.0.0.war The name of the WAR file to deploy.

Now that the WAR is deployed, the next thing to do is to verify the application was successfully deployed and is running on all the cluster node instances.

Deploy Verification

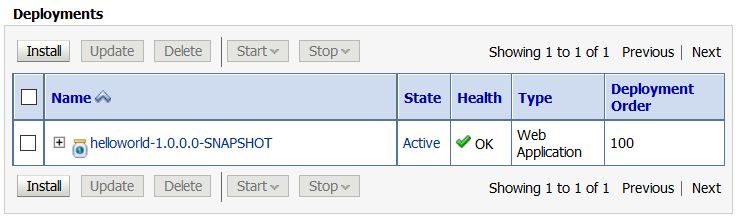
When you execute the asadmin deploy command above, after a short amount of time you should see the “Command deploy executed successfully” message. If so, that’s good! The application was successfully deployed to the cluster. To verify it was successfully deployed, execute the following on srv01.internal.dev:

$ asadmin list-applications --long true --type web c1

NAME                       TYPE   STATUS   
ferris-clusterjsp:1.1.0.0  <web>  enabled  
Command list-applications executed successfully.

This asadmin command asks Payara to list all applications of type web on cluster c1. There should be 1 result, the ferris-clusterjsp:1.1.0.0 application and its status should be enabled. And just to be sure everything is up and running, look at the status of the node instances by executing the following on srv01.internal.dev.

$ asadmin list-instances c1

srv02-instance-01   running  
srv02-instance-02   running  
srv03-instance-01   running  
srv03-instance-02   running  

This asadmin command tells you there are 4 instances in the c1 cluster and all 4 instances are running. The ferris-clusterjsp application is successfully running on the cluster. Next thing to do is to test it!

WAR Session Replication Testing

It is now time to see if session replication across the cluster is working. Doing so is not difficult, however, you will need to leave the command-line world and now start working with a browser. To test session replication is working properly, you will need to:

  1. Determine the link URLs to each individual cluster node instance running the application.
  2. Use a web browser to visit each link.

Links To Each Instance

The first thing you will need to do is find the URLs to access the ferris-clusterjsp application on each cluster node instance. Here is how you do it. The ferris-clusterjsp application is running on 4 cluster node instances, and each instance has its own URL. Get the list of links by following these steps:

  1. Open a web browser on srv01.internal.dev.
  2. Browse to the the Payara admin console at http://localhost:4848.
  3. Login (remember, you changed the admin password in Payara DAS Security Configuration).
  4. Click on the Applications tree node.

After clicking on the Applications tree node, you will see the ferris-clusterjsp:1.1.0.0 application listed. Figure 2 shows that in the Action column of the table is a hyperlink named Launch. Click it!

Figure 2 - The Launch link

Figure 2 - The Launch link

After clicking the Launch link, a new browser window will appear with all the links to the application across the cluster. Figure 3 shows 8 links. Each of the 4 cluster node instances are accessible by either HTTP or HTTPS.

Figure 3 - All the Links

Figure 3 - All the Links

Now that you know all the links, you can directly access the ferris-clusterjsp application on each of the 4 instances. This will allow you to test if session replication is working. If your first request is to instance srv02-instance–01, you will be able to see your session on any of the other 3 instances. Hopefully it will work!

Testing Replication

To test if session replication is working, all you need to do is access the application on one of the cluster node instances, take note of the session ID value, then access the application on a different node instance and see if your session replicated. Start first with srv02-instance–01. Open a web browser and browse to http://srv02.internal.dev:28080/ferris-clusterjsp. The application will show information about the cluster node instance and about the your session. Your browser will look similar to Figure 4a.

Figure 4a - ferris-custerjsp on srv02-instance–01

Figure 4a - ferris-custerjsp on srv02-instance-01
Figure 4a - ferris-custerjsp on srv02-instance–01

Figure 4a highlights a few pieces of information you will need to confirm session replication is working. First, the web browser URL is http://srv02.internal.dev:28080/ferris-clusterjsp and the host name of the URL matches the Served From Server information on the page. Also, the page shows you the session ID created for you - in this case 7ec99da15ef5c79d7c4bc3149d6b.

You now have a session on the application, and, if everything is working, that session should be replicated across the entire cluster. The only thing left to do to test this is to pick another cluster node instance and see if you get the same session. Pick srv03-instance–02 to test next. This cluster node instance is not only on a completely different physical machine, but it also switches protocol from HTTP to HTTPS. Open a web browser and browse to https://srv03.internal.dev:28182/ferris-clusterjsp. Figure 4b shows what should happen.

Figure 4b - ferris-custerjsp on srv03-instance–02

Figure 4b - ferris-custerjsp on srv03-instance-02
Figure 4b - ferris-custerjsp on srv03-instance–02

Figure 4b shows the results, and they look really good! Highlighted you can see the switch from HTTP to HTTPS (your web browser should have also forced you to accept the certificate). The web browser URL is https://srv03.internal.dev:28182/ferris-clusterjsp and the host name of the URL matches the Served From Server information on the page. But most importantly, you get the same session ID - in this case 7ec99da15ef5c79d7c4bc3149d6b.

Now you can have a little fun and test replication a bit more. Use the page to add some session attribute data and see if it replicates across the cluster. It doesn’t matter which cluster node instance you use use first. Pick one. Then go to the Enter session attribute data: section of the page and add session data as shown in Figure 5.

Figure 5 - Add session attribute data

Figure 5 - Add session attribute data

Click the ADD SESSION DATA button. Figure 6 shows the page will refresh and the session attribute data has been added.

Figure 6 - Session attribute data added

Figure 6 - Session attribute data added

After the session attribute data has been added, go to your other browser and refresh the page. You’ll see the data has been replicated. Figure 7 shows web browsers side-by-side with identical replicated session attribute data.

Figure 7 - Browsers side-by-side with same data

Figure 7 - Browsers side-by-side with same data

Congratulations! You now have a fully functioning, multi-VM, session replicated cluster. But there is something still missing: High Availability (HA). For HA, you’ll need a load balancer. So the next thing to look at is load balancer configuration.

Load Balancer Configuration

Right now you have a great multi-vm, session replicated cluster, but it’s kind of useless because it’s not accessible yet. You have the links to access each individual cluster node instances, but, having the URL for 1 instance doesn’t give you High Availability (HA). What you need now is a load balancer - something that can take a request to a generic URL like http://srv.internal.dev and proxy that request to any of the active instances in the cluster. And, thanks to successfully setting up session replication across the cluster, it doesn’t matter which instance the load balancer proxies your request to because your session data will be the same across the cluster. For this post, you are going to use NGINX as the the load balancer. This section will look at:

  1. NGINX Installation
  2. NGINX Configuration
  3. NGINX Testing

NGINX Installation

Installing NGINX is simple. You should be able to use apt-get to do this. Execute the following command on srv01.internal.dev. Remember in the architecture diagram for the zone, srv01.internal.dev is the machine in the zone which will run the load balancer.

$ apt-get install nginx

That’s it. NGINX is now installed. To get it working with your cluster node instances you will need to do a little configuration, which is what you will do next.

NGINX Configuration

This NGINX configuration is very simple. There are 2 things you need to do. The first is you need to setup an upstream configuration that contains the host names and port numbers of all the cluster node instances. The second is to update the location to proxy requests to the upstream.

upsteam First, look at the upstream configuration. Assuming you installed NGINX on srv01.internal.dev, open the /etc/nginx/nginx.conf file for editing. Edit the file and add an upstream configuration as shown in the following example. The upstream configuration goes inside of the http configuration.

http { 
  upstream cluster_c1 {
    server srv02.internal.dev:28080;
    server srv02.internal.dev:28081;
    server srv03.internal.dev:28080;
    server srv03.internal.dev:28081;
  }
}

Restart NGINX to pick up the changes.

$ /etc/init.d/nginx restart

location Next, look at the location configuration. Assuming you installed NGINX on srv01.internal.dev, open the /etc/nginx/sites-available/default file for editing. Edit the file and update the location configuration to MATCH the following example. The location configuration goes inside of the server configuration.

server { 
  listen  80;
  server_name  localhost;
  
  upstream cluster_c1 {
  location / {
    root  html;
    index index.html index.htm;
    proxy_connect_timeout   10;
    proxy_send_timeout  15;
    proxy_read_timeout  20;
    proxy_pass http://cluster_c1;
  }
}

Restart NGINX to pick up the changes.

$ /etc/init.d/nginx restart

NGINX Testing

By default, NGINX is configured to listen on port 80. You saw this in the previous section when you did the location configuration. If both NGINX and the Payara are up and running, here’s the easiest way to test.

  1. Open a web browser on srv01.internal.dev.
  2. Browse to http://localhost

Because NGINX is configured as a proxy in front of Payara, the browser will show the Payara-is-now-running page as in Figure 8.

Figure 8 - Payara with localhost proxied through NGINX

Figure 8 - Payara with localhost proxied through NGINX

That’s it. NGINX is now configured and working. That means you have the High Availability (HA) piece of the architecture ready to test. You can do that next.

WAR High Availablity (HA) Testing

You’re in the home stretch now. Here are all the pieces of the architecture so far:

  1. A Payara cluster able to support session replication.
  2. An application coded and configured to take advantage of session replication.
  3. A Payara cluster running multiple node instances.
  4. An NGINX load balancer configured to proxy requests to the cluster node instances.

Now it’s time to see if all the pieces work together. For these final tests, you need to have a web browser capable of sending requests through the NGINX load balancer. Remember 2 very important things:

  1. The load balancer is running on srv01.internal.dev on port 80.
  2. The URL you use must end with .internal.dev.

The easiest way to do this is to edit your testing machine’s hosts file and add a host to test the cluster. Assume the test hostname will be srv.internal.dev. Then add the following to your testing machine’s hosts file:

$ cat /etc/hosts
127.0.0.1  localhost
10.0.2.16  srv01.internal.dev srv01
10.0.2.17  srv02.internal.dev srv02
10.0.2.18  srv03.internal.dev srv03
10.0.2.16  srv.internal.dev

The first test you should do is to repeat the simple NGINX test. Only this time use the hostname you just saved in the hosts file. Perform the test by doing the following:

  1. Open a web browser on the testing machine.
  2. Browse to http://srv.internal.dev

Because NGINX is configured as a proxy in front of Payara, the browser will show the Payara-is-now-running page as in Figure 9. The difference this time is the URL uses the hostname saved in the hosts file.

Figure 9 - Payara with srv.internal.dev proxied through NGINX

Figure 9 - Payara with srv.internal.dev proxied through NGINX

Now here comes the final test to make sure everything is working. Open a web browse to the ferris-clusterjsp application and see what happens. Perform the test by doing the following:

  1. Open a web browser on the testing machine.
  2. Browse to http://srv.internal.dev/ferris-clusterjsp.

If everything goes OK, you will see the HA JSP Sample page handled by one of the cluster node instances. Figure 10 shows that srv03-instance-01 handled the first request.

Figure 10 - Payara with ferris-clusterjsp proxied through NGINX

Figure 10 - Payara with ferris-clusterjsp proxied through NGINX

Now the exciting part. Keep testing! Keep reloading the page. As seen in Figure 11, you will see the Served From Server instance: and Executed Server IP Address: change as the NGINX load balancer proxies requests to different cluster node instances, but the Session ID will remain the same. Cool!

Figure 11 - Payara with ferris-clusterjsp proxied through NGINX

Figure 11 - Payara with ferris-clusterjsp proxied through NGINX

Now for an even more fun test. High Availability (HA) means if a cluster node instance goes down the application still keeps running and your users are not impacted. Try it! Shut down one of the cluster node instances and see what happens. Execute the following command on srv01.internal.dev:

bash $ asadmin stop-instance srv03-instance-01

This will stop the 1 instance of the cluster. Now go back to your browser and start reloading the page. While you are reloading, watch the Served From Server instance: value. Because srv03-instance-01 is now shut down, you’ll notice this instance will be skipped as the load balancer round-robins through the cluster instances. One instance of your cluster is stopped, but your application is still working fine. If you want to start the instance again, Execute the following command on srv01.internal.dev:

$ asadmin start-instance srv03-instance-01

This will restart the instance. Now go back to your browser and start reloading the page again. While you are reloading, watch the Served From Server instance: value. You’ll eventually notice srv03-instance-01 will come back! :)

Summary

My goal for this post was to consolidate in one place the instructions to create a high availability (HA), session replicated, multi-machined Payara/GlassFish cluster. Hopefully I accomplished that goal by giving instructions for the following:

  1. Creating a multi-machine architecture for a cluster
  2. Installing Payara
  3. Configuring the DAS for cluster communication
  4. Creating the cluster
  5. Creating the cluster nodes
  6. Creating the cluster node instances
  7. Configuring a WAR to use session-replication
  8. Configuring NGINX for load balancing & proxying.
  9. Testing everything at every step of the way to make sure it’s all working.

I hope you have found this post useful. And also please note the title of this post says “(almost)” for a good reason: this is not the only way to create a high availability (HA), session replicated, multi-machined Payara/GlassFish cluster. But it is A way.

References

Java Servlet 3.1 Specification (2013, May 28). Java Servlet 3.1 Specification for Evaluation [PDF]. Retrieved from http://download.oracle.com/otndocs/jcp/servlet-3_1-fr-eval-spec/index.html

Hafner, S. (2011, May 12). Glassfish 3.1 – Clustering Tutorial Part2 (sessions) [Web log post]. Retrieved from https://javadude.wordpress.com/2011/05/12/glassfish-3-1-%E2%80%93-clustering-tutorial-part2-sessions/.

Hafner, S. (2011, April 25). Glassfish 3.1 - Clustering Tutorial [Web log post]. Retrieved from https://javadude.wordpress.com/2011/04/25/glassfish-3-1-clustering-tutorial/

Mason, R. (2013, September 03). Load Balancing Apache Tomcat with Nginx [Web log post]. Retrieved from https://dzone.com/articles/load-balancing-apache-tomcat

Fasoli, U. (2013, August 17). Glassfish Cluster SSH - Tutorial : How to create and configure a glassfish cluster with SSH (Part 2) [Web log post]. Retrieved from http://ufasoli.blogspot.com/2013/08/

Fasoli, U. (2013, July 17). Glassfish asadmin without password [Web log post]. Retrieved from http://ufasoli.blogspot.fr/2013/07/glassfish-asadmin-without-password.html

Oracle GlassFish Server 3.1 Section 1: asadmin Utility Subcommands. (n.d.). Retrieved from https://docs.oracle.com/cd/E18930_01/html/821-2433/gentextid-110.html#scrolltoc

Camarero, R. M. (2012, January 21). clusterjsp.war [WAR]. Retrieved from http://blogs.nologin.es/rickyepoderi/uploads/SimplebutFullGlassfishHAUsingDebian/clusterjsp.war

Croft, M. (2016, June 30). Creating a Simple Cluster with Payara Server [Web log post]. Retrieved from http://blog.payara.fish/creating-a-simple-cluster-with-payara-server

Administering GlassFish Server Clusters. (n.d.) Retrieved from https://docs.oracle.com/cd/E26576_01/doc.312/e24934/clusters.htm#GSHAG00005

Administering GlassFish Server Nodes. (n.d.). Retrieved from https://docs.oracle.com/cd/E26576_01/doc.312/e24934/nodes.htm#GSHAG00004

Administering GlassFish Server Instances. (n.d.). Retrieved from https://docs.oracle.com/cd/E26576_01/doc.312/e24934/instances.htm#GSHAG00006

March 28, 2017

An indexOfSubList(...) to Find all Matching SubLists

Quick Tip

Java comes with 2 useful methods for finding a sublist in a list: Collections.indexOfSubList(List<?> source, List<?> target) Collections.lastIndexOfSubList(List<?> source, List<?> target).

These are useful methods, however, with these 2 methods I can only find the first matching sublist and the last matching sublist. What about all the other sublists in between? What if there are 3 matching sublists, or 10, or 100? Here is a quick example (Listing 1) of an new, overloaded indexOfSubList(List<?> source, List<?> target, int fromIndex) that has an extra parameter, int fromIndex. This extra parameter gives you the ability to go through and find every matching sublist.

NOTE This code comes directly from the source code of the existing Collections.indexOfSubList(List<?> source, List<?> target>) method.

Listing 1 - Find all Matching SubLists

public static int indexOfSubList(List<?> source, List<?> target, int fromIndex) {
    int sourceSize = source.size();
    int targetSize = target.size();
    int maxCandidate = sourceSize - targetSize;

    ListIterator<?> si = source.listIterator();
    if (fromIndex > 0) {
        for (int i=0; i<fromIndex; i++) {
            si.next();
        }
    }
    nextCand:
        for (int candidate = fromIndex; candidate <= maxCandidate; candidate++) {
            ListIterator<?> ti = target.listIterator();
            for (int i=0; i<targetSize; i++) {
                if (!eq(ti.next(), si.next())) {
                    // Back up source iterator to next candidate
                    for (int j=0; j<i; j++)
                        si.previous();
                    continue nextCand;
                }
            }
            return candidate;
        }

    return -1;  // No candidate matched the target
}

private static boolean eq(Object o1, Object o2) {
    return o1==null ? o2==null : o1.equals(o2);
}

March 13, 2017

Regex Match HTML/XML with Laziness to get Tag Contents

Abstract

Regular expressions are extremely powerful. Figuring out how to get them to match what you want though can be a challenge. One of the tougher matches is with HTML/XML content. Often you get more matched than you want; that’s because you are being greedy. Be lazy! You’ll get a better match.

Disclaimer

This post is solely informative. Critically think before using any information presented. Learn from it but ultimately make your own decisions at your own risk.

Problem

Suppose you have the following bit of HTML.

<p> this is a <span>very</span> <b>cool</b> regex tip </p>

You want to use a capturing group to get the contents of the <span> tag. So you put together a regular expression that looks like this:

<span>(.+)<

But unfortunately this doesn’t get you the contents of the tag. The regular expression is to greedy and matches too much of the string. The regular expression matches all the way to the start of the closing paragraph tag.

<p> this is a <span>very</span> <b>cool</b> regex tip </p>

So what’s the problem here? The problem is the regular expression is being too greedy. Let’s make it less greedy and a bit more lazy.

Solution

The solution is to put together a regular expression that is a bit more lazy. This more lazy regular expression will stop matching once it hits the first new opening tag instead of matching to the last opening tag. Here is a more lazy regular expression.

<span>(.+?)<

Now this will match to the start of the closing </span> tag like you might expect it to. Plus, now that the matching is working more as expected, the capturing group can easily get the contents of the tag. Here is how the regular expression matches now.

<p> this is a <span>very</span> <b>cool</b> regex tip </p>

Summary

That’s it. Be a little more lazy and a little less greedy. I hope this has helped you a little bit figuring out your regular expression matching problem.

References

Goyvaerts, J. (2016, December 08). Laziness Instead of Greedinesss. Regular-Expressions.info. Retrieved from http://www.regular-expressions.info/repeat.htmlhttp://www.regular-expressions.info/repeat.html.

Java NIO, Files & Paths - Single Statement to Read File as a String

Quick Tip

Here is a quick example (Listing 1) of a single Java statement to read the contents of a file into a single String instance.

NOTE Don’t forget to specify the charset! It’s essential when working with text data.

Listing 1 - Single Statement File to String

String content = new String(
  Files.readAllBytes(
    Paths.get("File_To_Read.txt")
  )
  ,Charset.forName("UTF-8")
);

February 03, 2017

Simple Windows mirror directory backup with robocopy

Quick Tip

This is a simple Visual Basic script (Listing 1) that uses the windows robocoy command to perform a simple mirroring backup of a directory structure. Typically, use this to backup from your local machine to a network location just in case something happens to your hard drive.

NOTE This is a simple MIRROR copy backup strategy. There is no history maintained. If it’s obliterated during the backup, it’s gone!

Listing 1 - Single Statement File to String

Set WshShell = WScript.CreateObject ("WScript.Shell")
Return = WshShell.Run("cmd.exe /C robocopy C:\source X:\destination /MIR", 1)

January 18, 2017

Jacoco, Surefire & Argline: Why jacoco.exe isn't created

Abstract

Are you using Jacoco to give you statistics on the unit test coverage of your source code? Have you encountered a problem where jacoco.exe is not created by jacoco-maven-plugin?. Then keep reading, I’ve got your answer.

Disclaimer

This post is solely informative. Critically think before using any information presented. Learn from it but ultimately make your own decisions at your own risk.

Requirements

I did all of the work for this post using the following major technologies. You may be able to do the same thing with different technologies or versions, but no guarantees.

  • Java 1.8.0_65_x64
  • jacoco-maven-plugin 0.7.5.201505241946
  • maven-surefire-plugin 2.17
  • Maven 3.0.5 (Bundled with NetBeans)

Where are your tests?

Does your project even have unit tests? You sure? Take a look! If your project doesn’t have any unit tests, then jacoco.exe is not created. I’m sure your project already has unit tests, but, it’s always good to check that the lamp is plugged in first :). Now let’s get to a more interesting reason why jacoco.exe is not being created: <argLine>.

Watch out for <argLine>

If you have been using Jacoco and suddenly the jacoco.exe is not created, then chances are you have an <argLine> problem. Jacoco connects itself to the surefire plugin by editing the <argLine> value of that plugin. If you don’t set <argLine> then you’re fine. But if you do, you’ll mess up Jacoco if you don’t do it properly.

Let’s take a look at how NOT to do it. The <properties> tag is typically used to configure plugins and Listing 1 shows you what NOT to do.

Listing 1 - Don’t use <properties> to configure plugins

<properties>
  <!-- Do not configure plugin with properties -->
  <surefire.plugin.argline>-XX:PermSize=256m -XX:MaxPermSize=1048m</surefire.plugin.argline>
</properties>

Instead, configure <argLine> in the plugin itself, and include in the configuration the assumption that Jacoco has already set the <argLine> value. Listing 2 shows how to properly configure Surefire.

Listing 2 - Prepend Jacoco’s argLine value to your value

<build>
  <plugins>
      ...
      <plugin>
         <groupId>org.apache.maven.plugins</groupId>
         <artifactId>maven-surefire-plugin</artifactId>
         <configuration>
           <argLine>${argLine} -XX:PermSize=256m -XX:MaxPermSize=1048m</argLine>
         </configuration>
      </plugin>
      ...
  </plugins>
</build>

This may look a little funny - <argLine>${argLine} -XX:PermSize=256m -XX:MaxPermSize=1048m</argLine> - but this is really nothing more than string concatenation. The Jacoco plugin automatically sets the value argLine. So if you need to set its value too, you use a standard variable reference to ${argLine} to prepend Jacoco’s value to your value. Finally, Listing 3 shows a very basic jacoco-maven-plugin configuration.

Listing 3 - Very basic Jacoco configuration

<build>
  <plugins>
    ...
    <plugin>
      <groupId>org.jacoco</groupId>
      <artifactId>jacoco-maven-plugin</artifactId>
      <version>0.7.5.201505241946</version>
      <configuration>
        <excludes>
          <exclude>org/company/*</exclude>
        </excludes>
      </configuration>
      <executions>
        <execution>
          <id>default-prepare-agent</id>
          <phase>initialize</phase>
          <goals>
            <goal>prepare-agent</goal>
          </goals>
        </execution>
        <execution>
          <id>default-check</id>
          <phase>verify</phase>
          <goals>
            <goal>check</goal>
          </goals>
          <configuration>
            <rules>
              <rule implementation="org.jacoco.maven.RuleConfiguration">
                <element>BUNDLE</element>
                <limits>
                  <limit implementation="org.jacoco.report.check.Limit">
                    <counter>INSTRUCTION</counter>
                    <value>COVEREDRATIO</value>
                    <minimum>0.0</minimum>
                  </limit>
                  <limit implementation="org.jacoco.report.check.Limit">
                    <counter>BRANCH</counter>
                    <value>COVEREDRATIO</value>
                    <minimum>0.0</minimum>
                  </limit>
                  <limit implementation="org.jacoco.report.check.Limit">
                    <counter>CLASS</counter>
                    <value>MISSEDCOUNT</value>
                    <maximum>1000</maximum>
                  </limit>
                </limits>
              </rule>
            </rules>
          </configuration>
        </execution>
        <execution>
          <id>default-report</id>
          <phase>verify</phase>
          <goals>
            <goal>report</goal>
          </goals>
        </execution>
      </executions>
    </plugin>
    ...
  </plugins>
</build>

In listing 3, you can see the prepare-agent goal is configured to be executed at the initialize phase of the Maven life cycle. This goal is what sets the <argLine> value. Then, when the Surefire plugin runs, the jacoco.exe file gets created correctly and the unit test statistics are collected.

Summary

If jacoco.exe is not being created for you, the <argline> value is moste likely your problem. Remove any <properties> that set the argline value and configure <argLine> in the plugin itself. When you do so, remember to include Jacoco’s value by prepending the value like <argLine>${argLine} -XX:PermSize=256m -XX:MaxPermSize=1048m</argLine>.

References

Ryan Nelson. (2016, September 27). jacoco’s prepare-agent not generating jacoco.exec file [Web log comment]. Retrieved from http://stackoverflow.com/questions/21633277/jacocos-prepare-agent-not-generating-jacoco-exec-file.

Hoffmann, Marc R. (2013, October 3). jacoco.exec file is not generated after running jacoco maven ‘prepare-agent’ goal [Web log comment]. Retrieved from https://groups.google.com/forum/#!topic/jacoco/LzmCezW8VKA.

jacoco:prepare-agent. (n.d.). In EclEmma. Retrieved January 12, 2017, from http://www.eclemma.org/jacoco/trunk/doc/prepare-agent-mojo.html.

September 23, 2016

CDI @Inject beans into @Path JAX-RS Resource

Abstract

Recently, I was doing some research into JAX-RS and ran into a problem. I attempted to use CDI to @Inject a bean into the JAX-RS resource. It failed miserably. Different attempts produced different failures. Sometimes exceptions occurred during deployment, other times exceptions occurred when invoking the JAX-RS endpoint. After much trial and error, and some asking on Stackoverflow, I found 2 solution. This post describes these 2 solutions to get CDI and JAX-RS working together.

Requirements

I did all of the work for this post using the following major technologies. You may be able to do the same thing with different technologies or versions, but no guarantees.

  • Java EE 7
  • Payara 4.1.1.161
  • Java 1.8.0_65_x64
  • NetBeans 8.1
  • Maven 3.0.5 (Bundled with NetBeans)

Downloads

All of the research & development work I did for this post is available on my GitHub account. Feel free to download or clone the thoth-jaxrs GitHub project.

Exceptions

As soon as I tried to use CDI to @Inject a bean into a JAX-RS @Path resource, my application ran into trouble. I tried resolving the trouble in a lot of different ways but I kept getting either deployment exceptions or runtime exceptions. For reference, here are the exceptions I was typically getting.

Deployment Exception

The deployment exception obviously happened at deployment time. When these happened, the application failed to deploy.

Exception during lifecycle processing
java.lang.Exception: java.lang.IllegalStateException: ContainerBase.addChild: start: org.apache.catalina.LifecycleException: org.apache.catalina.LifecycleException: org.jboss.weld.exceptions.DeploymentException: WELD-001408: Unsatisfied dependencies for type InjectMe with qualifiers @Default at injection point [BackedAnnotatedField] @Inject private org.thoth.jaspic.web.InjectResource.me

Runtime Exception

The runtime exception happened when attempting to invoke the JAX-RS resource with a browser. For this exception, the application deployed without errors, but this one JAX-RS resource wasn’t working.

MultiException stack 1 of 1
org.glassfish.hk2.api.UnsatisfiedDependencyException: There was no object available for injection at SystemInjecteeImpl(requiredType=InjectMe, parent=InjectResource, qualifiers={}, position=-1, optional=false, self=false, unqualified=null, 1000687916))

Resolution 1: beans.xml

This is the first resolution I found. The key factor was adding a beans.xml file to the web project and configuring beans.xml with bean-discovery-mode="all". This allows CDI to consider all classes for injection. This is not a preferred solution however. For reference, here are all the major files in the project.

beans.xml

<?xml version="1.0" encoding="UTF-8"?>
<beans xmlns="http://xmlns.jcp.org/xml/ns/javaee"
       xmlns:xsi="http://www.w3.org/2001/XMLSchema-instance"
       xsi:schemaLocation="http://xmlns.jcp.org/xml/ns/javaee http://xmlns.jcp.org/xml/ns/javaee/beans_1_1.xsd"
       bean-discovery-mode="all">
</beans>

JAX-RS Application Configuration

import javax.ws.rs.core.Application;

@javax.ws.rs.ApplicationPath("webresources")
public class ApplicationConfig extends Application {

}

JAX-RS Resource

import java.security.Principal;
import javax.inject.Inject;
import javax.ws.rs.GET;
import javax.ws.rs.Path;
import javax.ws.rs.Produces;
import javax.ws.rs.core.Context;
import javax.ws.rs.core.MediaType;
import javax.ws.rs.core.SecurityContext;

@Path("inject")
public class InjectResource {

    @Inject
    private InjectMe injectMe;

    @GET
    @Produces(MediaType.TEXT_HTML)
    public String getText(@Context SecurityContext context) {
        Principal p = context.getUserPrincipal();
        String retval = "";
        retval += "<!DOCTYPE html>\n";
        retval += "<h3>Thoth</h3>\n";
        retval += "<h4>jaxrs-inject</h4>\n";
        retval += String.format("<p>injectMe=[%s]</p>\n", injectMe);
        return retval;
    }
}

Simple bean to inject

import java.io.Serializable;

public class InjectMe implements Serializable {

    private static final long serialVersionUID = 158775545474L;

    private String foo;
    
    public String getFoo() {
        return foo;
    }
    public void setFoo(String foo) {
        this.foo = foo;
    }
}

Resolution 2: Scope Annotations

The second resolution - and the preferred solution - is to annotate the classes with scope annotations. The key factor here is to annotate both the JAX-RS @Path resource and the bean to inject with a scope annotation. This then works with the CDI default discovery mode which is ‘annotated’. Because both these classes are annotated with scope annotations, CDI will automatically discover them without the need for a beans.xml file. And this is important because we want to avoid having a beans.xml if possible and configure the application with only annotations. For reference, here are all the major files in the project. In this example, both are annotated with @RequestScope which makes them discoverable to CDI.

NOTE Thanks to “leet java” and “OndrejM” for responding to my Stackoverflow question. I mistakenly assumed the @Path annotation made a class discoverable by CDI and they pointed that out to me, thanks!.

JAX-RS Application Configuration

import javax.ws.rs.core.Application;

@javax.ws.rs.ApplicationPath("webresources")
public class ApplicationConfig extends Application {

}

JAX-RS Resource

import java.security.Principal;
import javax.enterprise.context.RequestScoped;
import javax.inject.Inject;
import javax.ws.rs.GET;
import javax.ws.rs.Path;
import javax.ws.rs.Produces;
import javax.ws.rs.core.Context;
import javax.ws.rs.core.MediaType;
import javax.ws.rs.core.SecurityContext;

@Path("inject")
@RequestScoped
public class InjectResource {

    @Inject
    private InjectMe injectMe;

    @GET
    @Produces(MediaType.TEXT_HTML)
    public String getText(@Context SecurityContext context) {
        Principal p = context.getUserPrincipal();
        String retval = "";
        retval += "<!DOCTYPE html>\n";
        retval += "<h3>Thoth</h3>\n";
        retval += "<h4>jaxrs-inject-annotation</h4>\n";
        retval += String.format("<p>this=[%s]</p>\n", this);
        retval += String.format("<p>injectMe=[%s]</p>\n", injectMe);
        return retval;
    }
}

Simple bean to inject

import java.io.Serializable;
import javax.enterprise.context.RequestScoped;

@RequestScoped
public class InjectMe implements Serializable {

    private static final long serialVersionUID = 158775545474L;

    private String foo;

    public String getFoo() {
        return foo;
    }
    public void setFoo(String foo) {
        this.foo = foo;
    }
}

Summary

This problem and its eventual solution may seem trivial. However, when using tools (like NetBeans) to automatically generate your projects it’s easy to forget about things like annotations and beans.xml files since so much code is generated for you. So hopefully this will help you save some time if you run into this problem.

References

Remijan, M. (2016, September 22). Is bean-discovery-mode=“all” required to @Inject a bean into a Jersey @Path JAX-RS resource?. Retrieved from http://stackoverflow.com/questions/39648790/is-bean-discovery-mode-all-required-to-inject-a-bean-into-a-jersey-path-jax.

User2764975. (2015 September 18). CDI and Resource Injection with JAX-RS and Glassfish. Retrieved from http://stackoverflow.com/questions/32660066/cdi-and-resource-injection-with-jax-rs-and-glassfish.

August 12, 2016

Automating deployments to WebLogic with weblogic-maven-plugin and certificates

Abstract

So you use WebLogic. You also have continuous integration running (Bamboo, Jenkins, etc.) It would be nice to incorporate continuous deployments, and have deployments automated too. But how do you automate deployments from your CI build servers to your WebLogic servers? You may think, there’s a Maven plugin for that, and you’d be right! You might also think, “I can search Maven central, find the latest version of the plugin, and drop it into my POM.” If you have this thought, you’d be wrong! A Maven plugin does exist, but it’s unlike any Maven artifact you’ve ever used. This article describes in detail how to use weblogic-maven-plugin for continuous deployments. To do this, you’ll need to perform the following steps:

  1. Download, install, and configure WebLogic
  2. Create a WebLogic domain, which also automatically creates an admin server for the domain.
  3. Install the WebLogic crypto libraries into your Maven repository
  4. Generate the WebLogic config/key files and install them into your Maven repository
  5. Generate the WebLogic weblogic-maven-plugin.jar file and install it into your Maven repository.
  6. Add all the configuration to your project’s pom.xml to get weblogic-maven-plugin working.

Requirements

These are the version of the major pieces of software I used. No guarantees this will work if you use different versions.

  • WebLogic 10.3.6
  • Java 1.6.0_23
  • Maven 3.0.5

NOTE This article describes how to generate weblogic-maven-plugin using WebLogic 10.3.6. This plugin will work with 10.3.x version of WebLogic but the plugin has also successfully worked with WebLogic 12.1.3.

WebLogic

Download

Download WebLogic from the Oracle WebLogic Server Installers page. There are many different versions and file formats available to download. This article uses the ZIP format of version 10.3.6. So make sure you download the following:

  • Version 10.3.6
  • The Zip distribution named “- Zip distribution for Mac OSX, Windows, and Linux (183 MB)”

NOTE You will need an Oracle account to download.

After you have downloaded the ZIP file, you’ll need to unzip it. Unzipping is a piece of cake right? Not so fast. There can be a number of problems unzipping this file. Let’s take a look at unzipping next.

Unzip

Unzipping the WebLogic ZIP distribution can be a bit of a challenge. Both WinZip and 7-Zip gave errors on Windows. So you are better off using the Java jar command to unzip the file. Let’s do that now.

C:\>set JAVA_HOME=C:\Applications\Java\jdk1.6.0_20\x64
C:\>set PATH="%JAVA_HOME%\bin";%PATH%
C:\>cd C:\Applications
C:\>mkdir wls1036
C:\>cd wls1036
C:\Applications\wls1036>jar xvf C:\Users\Michael\Downloads\wls1036_dev.zip

When you are done, the wls1036 directory will look like this:

C:\Applications\wls1036>dir
 Volume in drive C is OS

 Directory of c:\Applications\wls1036

08/09/2016  10:51 AM    <DIR>          .
08/09/2016  10:51 AM    <DIR>          ..
11/15/2011  11:23 AM             1,421 configure.cmd
11/15/2011  11:23 AM             1,370 configure.sh
11/15/2011  11:23 AM             3,189 configure.xml
11/15/2011  11:23 AM               133 domain-registry.xml
11/15/2011  11:23 AM    <DIR>          modules
11/15/2011  11:23 AM             5,765 README.txt
11/15/2011  11:23 AM             1,138 registry.template
11/15/2011  11:23 AM    <DIR>          utils
11/15/2011  11:23 AM    <DIR>          wlserver
               6 File(s)         13,016 bytes
               5 Dir(s)  60,949,000,192 bytes free

Now that WebLogic has been unzipped, let’s look at its configuration next.

Configure

Simply execute configure.cmd that comes with WebLogic.

NOTE If you are prompted to create a new domain, DO NOT do so.

C:\>set JAVA_HOME=C:\Applications\Java\jdk1.6.0_20\x64
C:\>set PATH="%JAVA_HOME%\bin";%PATH%
C:\>set MW_HOME=C:\Applications\wls1036
C:\>%MW_HOME%\configure.cmd

Next we will look at creating a new domain.

Create Domain

You will need a directory to hold your domains. Create this first.

C:\>cd \
C:\>mkdir Domains
C:\>cd Domains
C:\Domains>mkdir mydomain

Now you will need to execute a WebLogic command to create the domain. This command must be executed within the mydomain directory.

NOTE Use a simple username/password like mydomain/mydomain1. You can use the WebLogic admin console to change it later.

C:\>set JAVA_HOME=C:\Applications\Java\jdk1.6.0_20\x64
C:\>set PATH="%JAVA_HOME%\bin";%PATH%
C:\>set MW_HOME=C:\Applications\wls1036

C:\>%MW_HOME%\wlserver\server\bin\setWLSEnv.cmd

C:\>cd C:\Domains\mydomain

C:\Domains\mydomain>%JAVA_HOME%\bin\java.exe -Dweblogic.management.allowPasswordEcho=true -Xmx1024m -XX:MaxPermSize=128m weblogic.Server

When you are done, the mydomain directory will look like this:

C:\Domains\mydomain>dir
 Volume in drive C is OS

 Directory of C:\Domains\mydomain

08/09/2016  11:21 AM    <DIR>          .
08/09/2016  11:21 AM    <DIR>          ..
08/09/2016  11:21 AM    <DIR>          autodeploy
08/09/2016  11:21 AM    <DIR>          bin
08/09/2016  11:21 AM    <DIR>          config
08/09/2016  11:21 AM    <DIR>          console-ext
08/09/2016  11:21 AM               472 fileRealm.properties
08/09/2016  11:21 AM    <DIR>          init-info
08/09/2016  11:21 AM    <DIR>          lib
08/09/2016  11:21 AM    <DIR>          security
08/09/2016  11:17 AM    <DIR>          servers
08/09/2016  11:21 AM               283 startWebLogic.cmd
08/09/2016  11:21 AM               235 startWebLogic.sh
               3 File(s)            990 bytes
              10 Dir(s)  60,934,422,528 bytes free

Now that you have successfully created a domain, you can start the WebLogic admin server and use the console to administer the domain. Let’s take a look at that next.

Startup

Once WebLogic has been configured and a domain created, you can start the WebLogic admin server and login to the console. But first there’s a bug you have to deal with.

Fix WebLogic Bug

For some reason, when WebLogic creates the domain, the scripts it generates to start the domain fail to set the %MW_HOME% environment variable. So this is what you need to do.

  1. Open C:\Domains\mydomain\startWebLogic.cmd in your favorite text editor
  2. Add this line: set MW_HOME=C:\Applications\wls1036

Now you should be able to start the admin server for the domain.

Start WebLogic

Execute this command to start WebLogic.

C:\>cd C:\Domains\mydomain
C:\Domains\mydomain>startWebLogic.cmd

Login to Admin Console

Browse to the admin console, http://localhost:7001/console, and login with the simple credentials (mydomain/mydomain1) you set when you ran the command to create the domain.

Now that WebLogic is installed, configured, and up and running, let’s start generating the artifacts weblogic-maven-plugin will need, including the plugin itself. We’ll start with something easy, the crypto library.

Crypto Library

In order to automate deployments to WebLogic, at some point you will need to know the admin username and password for the WebLogic admin console. The weblogic-maven-plugin can be configured with a clear-text username and password, but that’s not a good idea. An alternative is to generate a key pair. The key pair allows access without the need for a clear-text password. When WebLogic generates this key pair, the data in the files are encrypted. The weblogic-maven-plugin will need the crypto library in order to decrypt. So, let’s get the crypto library into your Maven repository.

Install

The file we want to install in your Maven repository is C:\Applications\wls1036\modules\cryptoj.jar. The easiest way to do it is to use the mvn install:install-file command to put it into your Maven repository.

C:\>set JAVA_HOME=C:\Applications\Java\jdk1.6.0_20\x64
C:\>set PATH="%JAVA_HOME%\bin";%PATH%

C:\>set MAVEN_HOME=C:\Applications\NetBeans\NetBeans 8.1\java\maven
C:\>set PATH="%MAVEN_HOME%\bin";%PATH%

C:\>mvn install:install-file -DgroupId=com.oracle.cryptoj -DartifactId=cryptoj -Dversion=1.0.0.0 -Dpackaging=jar -Dfile=C:\Applications\wls1036\modules\cryptoj.jar

Check your .m2\repositories directory afterwords to verify it was installed successfully. Now we have the ability to decrypt data in key pair files. So the next thing to do is generate them.

Key Pair Files

To login to the WebLogic admin (web-based) console, you need to know the admin username and password. But the admin console is not the only way you can administer a WebLogic domain. WebLogic also has the WebLogic Scripting Tool (WLST), which is a command-line interface for administering a domain. Command-line interfaces are nice because they allow you to script your configuration process. But, an admin username and password are still needed when using the WLST. You can hard code clear-text usernames and passwords in scripts, but auditors and security teams don’t like that very much. As an alternative, WebLogic can generate encrypted config/key files. So, what we are going to look at next is:

  1. Generating the config/key files for a WebLogic domain
  2. Testing the the files (got to make sure they work before we try to use them for real)
  3. Installing the config/key files into a Maven repository (this isn’t technically necessary, but, it’s really nice when it comes to automating deployments. You’ll see this later)

Fix WebLogic Bug

Before you can proceed with generating the WebLogic config/key files, first you need to fix a WebLogic bug. The easiest way to execute WLST is to use the C:\Applications\wls1036\wlserver\common\bin\wlst.cmd command. However, for some reason this file is completely empty! If you find yourself with an empty wlst.cmd file, here are its contents.

@ECHO OFF
SETLOCAL    

SET MW_HOME=C:\Applications\wls1036
SET WL_HOME=%MW_HOME%\wlserver
CALL "%WL_HOME%\server\bin\setWLSEnv.cmd"

if NOT "%WLST_HOME%"=="" (
    SET WLST_PROPERTIES=-Dweblogic.wlstHome=%WLST_HOME% %WLST_PROPERTIES%
)

SET CLASSPATH=%CLASSPATH%;%FMWLAUNCH_CLASSPATH%;%DERBY_CLASSPATH%;%DERBY_TOOLS%;%POINTBASE_CLASSPATH%;%POINTBASE_TOOLS%

@echo.
@echo CLASSPATH=%CLASSPATH%

SET JVM_ARGS=-Dprod.props.file="%WL_HOME%\.product.properties" %WLST_PROPERTIES% %MEM_ARGS% %CONFIG_JVM_ARGS%

"%JAVA_HOME%\bin\java" %JVM_ARGS% weblogic.WLST %*

Now, let’s generate some config/key files!

Generate

Generating the config/key files is done with a few commands. The hardest part of running these commands is determining the correct values to pass to connect(). In the example below, localhost is used because this example was created using a personal laptop. On servers, especially VMs or machines with multiple network cards, you need to know what network interface WebLogic bound to when the admin server started. Typically, if you take the URL you use to browse to the admin console - http://localhost:7001/console - and edit it for WLST - t3://localhost:7001 - you’ll be OK. Let’s take a look at the commands.

C:\>set JAVA_HOME=C:\Applications\Java\jdk1.6.0_20\x64
C:\>set PATH="%JAVA_HOME%\bin";%PATH%
C:\>set MW_HOME=C:\Applications\wls1036

C:\>%MW_HOME%\wlserver\server\bin\setWLSEnv.cmd
C:\>%MW_HOME%\wlserver\common\bin\wlst.cmd

wls:/offline> connect('USERNAME','PASSWORD','t3://localhost:7001');

wls:/mydomain/serverConfig> storeUserConfig('C:\Users\Michael\Desktop\wls.config','C:\Users\Michael\Desktop\wls.key');

Now that you have the config/key files generated, let’s test them to make sure they work. It is always a good idea to test any key pair you generate for a domain before trying to use them in automated scripts. It makes troubleshooting issues easier.

Test

Test the config/key file by using the weblogic.Deployer application to get a list of all the applications deployed to the WebLogic domain. To do this, execute the following commands:

NOTE Make sure your WebLogic admin server is running before you try to test the config/key files.

C:\>set JAVA_HOME=C:\Applications\Java\jdk1.6.0_20\x64
C:\>set PATH="%JAVA_HOME%\bin";%PATH%
C:\>set MW_HOME=C:\Applications\wls1036

C:\>%MW_HOME%\wlserver\server\bin\setWLSEnv.cmd
C:\>java weblogic.Deployer -adminurl "t3://localhost:7001" -userconfigfile "C:\Users\Michael\Desktop\wls.config" -userkeyfile "C:\Users\Michael\Desktop\wls.key" -listapps

After executing the weblogic.Deployer application, the output will look similar to this:

weblogic.Deployer invoked with options:  -adminurl t3://localhost:7001 -userconfigfile C:\Users\Michael\Desktop\wls.config -userkeyfile C:\Users\Michael\Desktop\wls.key -listapps
There is no application to list.

C:\>

If you get this, congratulations! Your config/key files are working. Now let’s get these config/key files into your Maven repository. This will be similar to what you did for the crypto library. Let’s take a look.

Install

Let’s assume the config/key files are on your Desktop. To install them in your Maven repository the first thing you need to do is ZIP them up. The ZIP archive should look like figure 1.

Figure 1 - Zip archive of config/key files

Zip archive of config/key files

After the ZIP file is created, use the use the mvn install:install-file command to put it into your computer’s local repository.

C:\>set JAVA_HOME=C:\Applications\Java\jdk1.6.0_20\x64
C:\>set PATH="%JAVA_HOME%\bin";%PATH%

C:\>set MAVEN_HOME=C:\Applications\NetBeans\NetBeans 8.1\java\maven
C:\>set PATH="%MAVEN_HOME%\bin";%PATH%

C:\>mvn install:install-file -DgroupId=com.oracle.weblogic.keys -DartifactId=localhost -Dversion=1.0.0.0 -Dpackaging=zip -Dfile=C:\Users\Michael\Desktop\Key.zip

-DgroupId and -DartifactId. The values for -DgroupId and -DartifactId are largely a detail up to you. When setting these values, keep in mind that you will be generating keys for every WebLogic domain that will be targets of automated deployments. So it’s a good idea to keep the values for -DgroupId and -DartifactId such that it’s easy to distinguish the environment and domain the keys are for.

-Dpackaging=zip. Don’t skip this value and note it’s value is zip. The majority of the time JAR files are put into a Maven repository, but this artifact is a ZIP.

NOTE Yes, I know that a JAR file and ZIP file are the same file format.

Check your .m2\repositories directory afterwords to verify it was installed successfully. With the key pair in the Maven repository, what’s next to do is to generate the weblogic-maven-plugin itself. Let’s do it.

Plugin JAR

At this point, you have installed the crypto libraries into your Maven repository (essential for decrypting the WebLogic config/key files) and you have generated the WebLogic config/key files (essential for eliminating clear-text usernames and passwords) and have also installed both of them into your Maven repository. Now let’s generate the plugin itself.

Generate

To generate weblogic-maven-plugin use the wljarbuilder tool and configure it to build the plugin. This tool comes with WebLogic and is located in wlserver\server\lib directory. Here are the commands to generate the plugin.

C:\>set JAVA_HOME=C:\Applications\Java\jdk1.6.0_20\x64
C:\>set PATH="%JAVA_HOME%\bin";%PATH%
C:\>set MW_HOME=C:\Applications\wls1036

C:\>cd %MW_HOME%\wlserver\server\lib
C:\Applications\wls1036\wlserver\server\lib>java -jar wljarbuilder.jar -profile weblogic-maven-plugin

This will run for a while. While it’s running, it will build an uber weblogic-maven-plugin.jar file. That’s it! That’s the plugin. Not too exciting is it? Well now you need to install the weblogic-maven-plugin.jar file into your Maven repository. That will be a little more exciting.

Install

Installing weblogic-maven-plugin into your Maven repository is pretty much the same as installing any other artifact. However, to make using the plugin easier, you need to update the plugin’s POM file before installing the plugin. Let’s do it.

Extract POM. Use the Java jar tool to extract the pom.xml file from weblogic-maven-plugin.jar. When you execute this command, the pom.xml file will be extracted in the same directory as weblogic-maven-plugin.jar.

C:\>set JAVA_HOME=C:\Applications\Java\jdk1.6.0_20\x64
C:\>set PATH="%JAVA_HOME%\bin";%PATH%
C:\>set MW_HOME=C:\Applications\wls1036

C:\>cd %MW_HOME%\wlserver\server\lib
C:\Applications\wls1036\wlserver\server\lib>jar xvf weblogic-maven-plugin.jar META-INF/maven/com.oracle.weblogic/weblogic-maven-plugin/pom.xml

Update POM. Now you want to update pom.xml and add a dependency on the crypto library. Remember, you installed the crypto library into the Maven repository earlier. Doing this makes weblogic-maven-plugin easier to use because Maven will automatically pull the crypto library out of the repository when the plugin needs to decrypt the WebLogic config/key files. Use your favorite text editor to open the C:\Applications\wls1036\wlserver\server\lib\META-INF\maven\com.oracle.weblogic\weblogic-maven-plugin\pom.xml file. Below you’ll see a piece of XML surrounded by the <!-- BEGIN --> and <!-- END --> comments. Copy what’s between these comments into your pom.xml.

<project xmlns="http://maven.apache.org/POM/4.0.0"
  xmlns:xsi="http://www.w3.org/2001/XMLSchema-instance"
  xsi:schemaLocation="http://maven.apache.org/POM/4.0.0 http://maven.apache.org/maven-v4_0_0.xsd">
  <modelVersion>4.0.0</modelVersion>
  <groupId>com.oracle.weblogic</groupId>
  <artifactId>weblogic-maven-plugin</artifactId>
  <packaging>maven-plugin</packaging>
  <version>10.3.6.0</version>
  <name>Maven Mojo Archetype</name>
  <url>http://maven.apache.org</url>
  <dependencies>
    <dependency>
      <groupId>org.apache.maven</groupId>
      <artifactId>maven-plugin-api</artifactId>
      <version>2.0</version>
    </dependency>
    <!-- ADD THIS DEPENDENCY TO YOUR pom.xml -->
    <!-- BEGIN -->
    <dependency>
      <groupId>com.oracle.cryptoj</groupId>
      <artifactId>cryptoj</artifactId>
      <version>1.0.0.0</version>
    </dependency>
    <!-- END -->
  </dependencies>
</project>

Install-file. After you have finished editing the pom.xml file, you are now ready to use the mvn install:install-file command to put the weblogic-maven-plugin.jar file into your Maven repository.

C:\>set JAVA_HOME=C:\Applications\Java\jdk1.6.0_20\x64
C:\>set PATH="%JAVA_HOME%\bin";%PATH%

C:\>set MAVEN_HOME=C:\Applications\NetBeans\NetBeans 8.1\java\maven
C:\>set PATH="%MAVEN_HOME%\bin";%PATH%

C:\>set MW_HOME=C:\Applications\wls1036
C:\>cd %MW_HOME%\wlserver\server\lib

C:\Applications\wls1036\wlserver\server\lib>mvn install:install-file -DpomFile=.\META-INF\maven\com.oracle.weblogic\weblogic-maven-plugin\pom.xml -Dfile=weblogic-maven-plugin.jar

Check your .m2\repositories directory afterwords to verify it was installed successfully. Now that the crypto library, the WebLogic config/key files, and the plugin are in the Maven repository, it’s time to update your project’s pom.xml to automatically deploy to WebLogic.

Project POM

After installing the crypto library into your Maven repository, generating the WebLogic config/key files and installing them into your Maven repository, and generating the weblogic-maven-plugin.jar file and installing it into your Maven repository, you are now finally ready to configure your application for automated deployment to WebLogic. You will need to edit your project’s pom.xml and add the following pieces:

  1. A <profile> for deployment
  2. A <plugin> to extract the WebLogic config/key files
  3. A <plugin> to deploy to WebLogic

So let’s look at this configuration and see how all of these pieces fit together to automatically deploy your artifact to WebLogic.

Add to pom.xml

Here is an example showing what you need to add to your project’s pom.xml file. This example brings together everything you have generated and configured. Let’s take a look at this in more detail.

<profiles>
  <profile> 
    <!-- PROFILE SPECIFICALLY FOR DEPLOYING TO LOCALHOST -->    
    <!-- ADD ADDITIONAL PROFILES FOR DIFFERENT ENVIRONMENTS -->  
    <id>deploy-localhost</id>

    <!-- DEPENDENCY ON THE **LOCALHOST** CONFIG/KEY FILES -->
    <!-- DIFFERENT ENVIRONMENTS WILL HAVE THEIR OWN CONFIG/KEY FILES -->
    <dependencies>
      <dependency>
        <groupId>com.oracle.weblogic.keys</groupId>
        <artifactId>localhost</artifactId>
        <version>1.0.0.0</version>
        <type>zip</type>  
        <scope>provided</scope>
      </dependency>        
    </dependencies>

    <build>
      <plugins>

        <!-- UNPACK CONFIG/KEY FILES TO ./target/keys DIRECTORY -->
        <plugin>  
          <groupId>org.apache.maven.plugins</groupId>  
          <artifactId>maven-dependency-plugin</artifactId>  
          <version>2.6</version>  
          <executions>  
            <execution>  
              <id>unpack-dependencies</id>  
              <phase>prepare-package</phase>  
              <goals>  
                <goal>unpack-dependencies</goal>  
              </goals>  
              <configuration>     
                <includeArtifactIds>localhost</includeArtifactIds>         
                <outputDirectory>
                  ${project.build.directory}/keys
                </outputDirectory>             
              </configuration>  
            </execution>  
          </executions>  
        </plugin>  

        <!-- DEPLOY WAR TO "myserver" ON WEBLOGIC DOMAIN -->
        <plugin> 
          <groupId>com.oracle.weblogic</groupId>
          <artifactId>weblogic-maven-plugin</artifactId>
          <version>10.3.6.0</version> 
          <configuration> 
            <adminurl>t3://localhost:7001</adminurl>
            <targets>myserver</targets>
            <userConfigFile>${project.build.directory}/keys/wls.config</userConfigFile>
            <userKeyFile>${project.build.directory}/keys/wls.key</userKeyFile>            
            <upload>true</upload> 
            <action>deploy</action> 
            <remote>false</remote> 
            <verbose>true</verbose> 
            <source>
              ${project.build.directory}/${project.build.finalName}.${project.packaging}
            </source> 
            <name>${project.build.finalName}</name> 
          </configuration> 
          <executions> 
            <execution> 
              <phase>install</phase> 
              <goals> 
                <goal>deploy</goal> 
              </goals> 
            </execution> 
          </executions> 
        </plugin> 
      </plugins>
    </build>
  </profile>
</profiles>

Create a <profile> for an environment. A <profile> is created with the value <id>deploy-localhost</id>. This <id> value makes it clear this profile is for localhost deployment. Each environment gets its own profile.

Configure <dependency> on the config/key files. This <dependency> is within the <profile> and that’s on purpose! The <dependency> belongs in the <profile> because:

  • The config/key files are only needed for deployment
  • The config/key files are unique to each environment

You can put the <dependency> at the project level, but if you do that it may end up being packaged with your artifact. This doesn’t make any sense to do because this <dependency> is only used for automated deployments.

Configure config/key <plugin>. Here you use maven-dependency-plugin and its unpack-dependencies goal. Remember, the config/key files are in the Maven repository as a ZIP artifact, but you need to get at the individual files inside the ZIP artifact. Using the maven-dependency-plugin and its unpack-dependencies goal will do this for you. The maven-dependency-plugin will unzip the files to <outputDirectory>, which in this example is the target/keys directory.

Now you might ask, “Why not just put the config/key files somewhere on the file system? Why go through the extra effort to get them out of the Maven repository?” The answer is that it’s actually much less effort getting it from the Maven repository, and here’s why. It’s automated! Once the keys are in the Maven repository and your project’s pom.xml file is configured, everything is completely automated after that. No need to have any extra manual steps on any machine that will be running the automated deploys. How cool is that!

Configure deployment <plugin>. You’ve finally gotten to configuring weblogic-maven-plugin itself. Bet you were never going to get here, huh? Anyway, the configuration is fairly trivial. The <adminurl>t3://localhost:7001</adminurl> value is exactly the same used by WLST in the “Key Pair Files” section. The <targets>myserver</targets> value is a comma-separated list of the names of the servers on that WebLogic domain you want to deploy to. The <userConfigFile> and <userKeyFile> point to the config/key files that are automatically pulled out of the Maven repository and unzipped for you by maven-dependency-plugin. The <source> value is the artifact your project built, typically a WAR like .\target\helloworld-1.0.0.0.war. Finally, the <name> value is the name given to the deployment inside of WebLogic. This value is important because if the plugin finds something deployed to WebLogic that has the same name, it will be replaced. This is typically what you want to do, because the whole point of automating deployments is replace what’s out there with the latest and greatest version.

That’s it! If you run your project and see what happens.

```bat C:>set JAVA_HOME=C:\Applications\Java\jdk1.6.0_20\x64 C:>set PATH=“%JAVA_HOME%\bin”;%PATH%

C:>set MAVEN_HOME=C:\Applications\NetBeans\NetBeans 8.1\java\maven C:>set PATH=“%MAVEN_HOME%\bin”;%PATH%

C:>Project C:\Project>mvn clean install -P deploy-localhost ```

If WebLogic is up and running, and everything is configured correctly, you should get SUCCESS. If you do, congratulations!

Target Assignments:
+ helloworld-1.0.0.0-SNAPSHOT  myserver
------------------------------------------------------------------------
BUILD SUCCESS
------------------------------------------------------------------------

If you login to the WebLogic admin console and browse to the deployments, you’ll see your application listed. Figure 2 shows an example.

Figure 2 - Deployments screenshot

Deployments screenshot

Summary

It took a while to get here, but you finally made it. Let’s quickly review. The goal is to automate deployments to WebLogic using the weblogic-maven-plugin. To achieve this goal, you must:

  1. Download, install, and configure WebLogic
  2. Create a WebLogic domain, which also automatically creates an admin server for the domain.
  3. Install the WebLogic crypto libraries into your Maven repository
  4. Generate the WebLogic config/key files and install them into your Maven repository
  5. Generate the WebLogic weblogic-maven-plugin.jar file and install it into your Maven repository.
  6. Fix a few WebLogic bugs along the way :)
  7. Add all the configuration to your project’s pom.xml to get the weblogic-maven-plugin working.

It’s all a little exhausting, but once it’s done the benefits of having automated deploys is well worth it.

References

Oracle WebLogic Server Installers. (n.d.). oracle.com. Retrieved from http://www.oracle.com/technetwork/middleware/weblogic/downloads/wls-main-097127.html.

Blathers, B. (2011, February 21). Using Secure Config Files with The WebLogic Maven Plugin. Retrieved from http://buttso.blogspot.com/2011/02/using-secure-config-files-with-weblogic.html.

Eisele, M. (2011, January 15). Installing and Using the WebLogic 10.3.4.0 Maven Plug-In for Deployment. Retrieved from http://blog.eisele.net/2011/01/using-and-installing-weblogic-10340.html.

Using the WebLogic Development Maven Plug-in. (n.d.). oracle.com. Retrieved from http://docs.oracle.com/middleware/1212/wls/WLPRG/maven.htm#WLPRG620.

July 20, 2016

Version Number Strategy

Abstract

I am working on a new open source project named Riviera. The purpose of Riviera is to be a database versioning source code management tool. Riviera is a Java based implementation of the philosophy and practice of database version control written about by K. Scott Allen. But before Riviera can manage changing database versions, it first must know how those numbers are going to change. The purpose of this post is to define a clear strategy for understanding how version numbers change throughout the software development life cycle.

Numbers

Versions will consist of 4 integers separated by dots with an optional dash qualifier at the end. The format for a version number is A.B.C.D[-QUALIFIER]. Let’s take a look at what each of these numbers mean.

A

This represents a major version. This number is used by a project manager to track releases. How and when this number changes is up to the project. Most like to change this number when a significant change is made to the project. Others like to change this number on a yearly basis. Determine how you want to change this number and stay consistent. Major versions can’t get to production without planned releases, which is what’s next, B.

B

This represents a planned release of the major version. This value increments every planned release. A.B together are critical for project managers to plan, estimate, and track features in releases.
NOTE Planning releases? What about Scrum? What about development teams determining what to work on each sprint, scrum masters, and no project managers? Well, if you are working in an environment like this, congratulations! Now back to reality :)
Suppose a new project is spinning up. Project managers start planning for release “1.0” - which is the 1st planned release 0 of major version 1. This release will include features f1, f2, & f3.
While developers are working on “1.0”, project managers can start planning for release “1.1” - which is the 2nd planned release 1 of major version 1. This release will include features f4 & f5.
And so planning continues following this pattern. The scope of features for A.B is determined and the development team works on them. This planning works great until a bug is found in production. To get emergency bug fixes, C is needed.

C

This represents an emergency bug fix of a planned release. Recall that a planned release is represented by A.B. An emergency bug fix of A.B is represented by A.B.C. A.B.C together are critical for project managers to plan, estimate, and track bug fixes.
If a bug is found in “1.3”, and must be fixed in production immediately, the 1st bug fix of “1.3” will be “1.3.1”. Once “1.3.1” goes to production, the C version number keeps incrementing as more emergency bug fixes need to be made:
  • “1.3.1” – 1st emergency bug fix of “1.3”
  • “1.3.2” – 2nd emergency bug fix of “1.3”
  • “1.3.3” – 3rd emergency bug fix of “1.3”
  • “1.3.4” – 4th emergency bug fix of “1.3”
Project managers can plan releases all they want, but nothing will get done unless the software gets built. D makes sure builds can happen. Let’s take a look at D next.

D

This represents an incremental build number. This number is typically manged by some automated build system (Maven) and is used for internal purposes only.
The build number tracks the number of builds made of a planned release or an emergency bug fix. Let’s take a look at each of these.

Incremental build of a planned release.

Suppose the development team is working on planned release “1.3”. As features are finished, builds are made for testing. Each build increments the D value.
  • 1.3.0.0 – 1st build of planned release “1.3”
  • 1.3.0.1
  • 1.3.0.2
  • 1.3.0.3
  • 1.3.0.4
Ultimately, when “1.3” is finished and ready to go to production, the internally tracked build going to production may be 1.3.0.15.

Incremental build of emergency bug fix.

Suppose the development team is working on emergency bug fix “1.3.1”. As the bugs are fixed, builds are made for testing. Each build increments the D value.
  • 1.3.1.0 – 1st build of emergency bug fix “1.3.1”
  • 1.3.1.1
  • 1.3.1.2
  • 1.3.1.3
Ultimately, when the “1.3.1” is finished and ready to go to production, the internally tracked build going to production may be 1.3.1.4.

[-QUALIFIER]

This is an optional part of a version number. Maven uses -SNAPSHOT to represent non-official builds.

GIT, Subversion, CVS, etc.

Now that the format of the version number has been defined, let’s consider the effects on the change control system (GIT, Subversion, CVS, etc.). To do this, we’ll follow a hypothetical development time line. As you read through the time line, reference figure 1 to see how the trunk, branches, and tags change over time.

Time Line

  • Planning for the “1.0” release is complete. Development starts. Trunk is at 1.0.0.0 (a).
  • “1.0” features completed. A build is made for testing. Tag 1.0.0.0 is created from trunk. Trunk becomes 1.0.0.1 (b)
  • “1.0” features completed. A build is made for testing. Tag 1.0.0.1 is created from trunk. Trunk becomes 1.0.0.2 (c)
  • “1.0” features completed. A build is made for testing. Tag 1.0.0.2 is created from trunk. Trunk becomes 1.0.0.3 (d)
  • Planning for “1.1” release is complete. Branch 1.0.0 is created for ongoing “1.0” development. Trunk becomes 1.1.0.0 and “1.1” development starts on trunk. (e)
  • “1.0” features completed. A build is made for testing. Tag 1.0.0.3 is created from branch. Branch becomes 1.0.0.4. Changes from branch merged into trunk. (f)
  • “1.1” features complete. A build is made for testing. Tag 1.1.0.0 is created from trunk. Trunk becomes 1.1.0.1 (g)
  • “1.0” features completed. A build is made for testing. Tag 1.0.0.4 is created from branch. Branch becomes 1.0.0.5. Changes from branch merged into trunk. (h)
  • “1.1” features complete. A build is made for testing. Tag 1.1.0.1 is created from trunk. Trunk becomes 1.1.0.2 (i)
  • “1.0” FINISHED. Build 1.0.0.4 goes to production (j)
  • “1.1” features complete. A build is made for testing. Tag 1.1.0.2 is created from trunk. Trunk becomes 1.1.0.3 (k)
  • “1.1” features complete. A build is made for testing. Tag 1.1.0.3 is created from trunk. Trunk becomes 1.1.0.4 (l)
  • “1.1” features complete. A build is made for testing. Tag 1.1.0.4 is created from trunk. Trunk becomes 1.1.0.5 (m)
  • “1.0” EMERGENCY BUG FIX. Create branch from 1.0.0.4 tag (the build in production). Branch becomes 1.0.1.0 (n)
  • “1.0.1” EMERGENCY BUG FIX complete. A build is made for testing. Tag 1.0.1.0 is created from branch. Branch becomes 1.0.1.1. Changes in branch merged into trunk (o)
  • “1.0.1” EMERGENCY BUG FIX complete. A build is made for testing. Tag 1.0.1.1 is created from branch. Branch becomes 1.0.1.2. Changes in branch merged into trunk (p)
  • “1.1” features complete. A build is made for testing. Tag 1.1.0.5 is created from trunk. Trunk becomes 1.1.0.6 (q)
  • “1.0.1” EMERGENCY BUG FIX complete. A build is made for testing. Tag 1.0.1.2 is created from branch. Branch becomes 1.0.1.3. Changes in branch merged into trunk (r)
  • “1.0.1” FINISHED. Build 1.0.1.2 goes to production (s)
  • And it continues…

Figure 1 - Trunk, Branches, & Tags

 TRUNK
1.0.0.0------                                       (a)
   |         \
   |         TAG
   |       1.0.0.0                                  (b)
   |
1.0.0.1------                                       (b)
   |         \
   |         TAG
   |       1.0.0.1                                  (c)
   |
1.0.0.2------                                       (c)
   |         \
   |         TAG
   |       1.0.0.2                                  (d)
   |
1.0.0.3------                                       (d)
   |         \
   |       BRANCH
   |       1.0.0.3------                            (e)
   |          |         \
   |          |         TAG
   |          |       1.0.0.3                       (f)
   |          |
   |       1.0.0.4------                            (f)
   |          |         \
   |          |         TAG------
   |          |       1.0.0.4    \                  (h) (j)
   |          |                 BRANCH------
   |       1.0.0.5              1.0.1.0     \       (h) (n)
   |          |                    |        TAG
   |          -                    |      1.0.1.0   (o)
   |                               |
   |                            1.0.1.1------       (o)
   |                               |         \
   |                               |        TAG
   |                               |      1.0.1.1   (p)
   |                               |
   |                            1.0.1.2------       (p)
   |                               |         \
   |                               |        TAG
   |                               |      1.0.1.2   (r) (s)
   |                               |
   |                            1.0.1.3             (r)
   |
1.1.0.0------                                       (e)
   |         \
   |         TAG
   |       1.1.0.0                                  (g)
   |
1.1.0.1------                                       (g)
   |         \
   |         TAG
   |       1.1.0.1                                  (i)
   |
1.1.0.2------                                       (i)     
   |         \
   |         TAG
   |       1.1.0.2                                  (k)
   |
1.1.0.3------                                       (k)     
   |         \
   |         TAG
   |       1.1.0.3                                  (l)
   |
1.1.0.4------                                       (l)     
   |         \
   |         TAG
   |       1.1.0.4                                  (m)
   |
1.1.0.5------                                       (m)     
   |         \
   |         TAG
   |       1.1.0.5                                  (q)
   |
1.1.0.6                                             (q)

Summary

Handling version numbers is always a tricky thing, especially when you have multiple lines of development going on different branches and all the work needs to be coordinated and merged. This strategy seems to work well. The hard part is sticking to it!

References

Allen, S. (2008, February 4). Versioning Databases - Branching and Merging. Ode to Code. Retrieved from http://odetocode.com/blogs/all?page=75.

July 19, 2016

Welcome to Scrivener

Abstract

Begin typing your abstract paragraph here. This paragraph should not be indented. It should range between 150 and 250 words. This should be accurate, nonevaluative, readable, and concise. The reader should know exactly what this blog post is about.

Scrivener

Scrivener is a powerful writing tool which can be used for all kinds of writing. Originally developed for writing novels, Scrivener is now used for short stories, plays, scripts, theses, and lots of other kinds of writing including blogging.

Scrivener separates the content of what you write from its output format. Compiling is how to get the output format. For bloggers, Scrivener supports the markdown syntax. Let’s take a look at markdown.

Markdown

Markdown is a markup format for writers that’s easier than HTML, but is ultimately turned into HTML. A cheat sheet shows just how simple it is. Scrivener compiles a markdown formatted writing into HTML. After that, copy & paste the HTML into the HTML Editor of your blogging platform.

NOTE The HTML generated is quite simple. Your blog’s CSS will need to be updated to present it nicely. Typically somewhere in the settings you’ll find a spot to edit the contents of the blog template. It’s here you can add custom CSS to format the markdown-generated HTML.

Code

All technical blogs will need to show code. There will be int inlineCode = 1; examples. And there will be block code examples referred to by listings. Listing 1 is a Java block code example.

Listing 1 - Java Hello World

public static final void main(String [] args) {
  System.out.println("Hello world!");
}

Images

Images are also essential. Figure 1 is an example of an image. This image is not embedded in the blog. It is referencing an image from another website. This is a bit dangerous to do because if the website removes the image, it will no longer appear on the blog. An alternative is to upload images to the blog and reference the URLs created for those images. Or host the images on a site like Flickr. Or save the images to Dropbox and get a shared link to the image.

Figure 1 - Duke

Java Duke waving
Java Duke waving

Summary

It is always good to wrap up a blog posting with a summary of the contents. Sometimes blog posts are small quick tips and a summary is not necessary. But if the blog post is presenting lengthy contents, then a summary is good to help remind blog readers what they just read.

References

And don’t forget your references! People contribute a lot of information online, so it’s good to cite your sources.

Pritchard, A. (2016, February 26). Markdown Cheatsheet. Website Title. Retrieved from https://github.com/adam-p/markdown-here/wiki/Markdown-Cheatsheet

June 20, 2016

Unit Testing JPA...Stop Integration Testing!

Introduction
I want to start by asking a simple question.
"How do you unit test your JPA classes?"
Now, before you answer look carefully at the question.  The key words are unit test.  Not test but unit test.

Conversation
In my experience, after asking this question, the conversation goes something like this.
"How do you unit test your JPA domain objects?"
"We've developed this shared project which starts an in-memory Derby database (See my previous blog article about how to do this for integration testing) and it automatically runs scripts in your project to build the database and insert data for the tests."
 "Where is this shared project?"
"It's in Nexus.  We pull it in as a Maven dependency."
"I see it in the POM.  You know this dependency doesn't have <scope>test</scope>"
 "Huh?"
"Never mind.  Where's the source code for the project?"
 "The person who made it doesn't work here anymore so we don't know where the source code is.  But we haven't had to change it."
"Where's the documentation?"
"Umm...we just copy stuff from existing projects and change the DDLs and queries"
"Why are you starting Derby for a unit test?  Unit tests must be easy to maintain and fast to run.  You can't be starting any frameworks like JPA or relying on external resources like a database.  They make the unit tests complicated and slow running."
 "Well, the classes use JPA, you need a database to test them."
"No, you don't.  You don't need to start a database.  JPA relies heavily on annotations.   All you need to do is make sure all the classes, fields, and getters are annotated correctly. So just unit test the annotations and the values of their properties."
"But that won't tell you if it works with the database."
"So?  You are supposed to be writing simple and fast unit tests! Not integration tests! For a unit test all you need to know is if the JPA classes are annotated properly. If they're annotated properly they'll work."
"But what if the databases changes?"
"Good question, but not for a unit test.  For a unit test all you need to know is that what was working before is still working properly.  For frameworks like JPA that depend on annotations to work properly, your unit tests need to make sure the annotations haven't been messed around with."
"But how do you know if the annotations are right? You have to run against a database to get them right."
"Well, what if you weren't using JPA, what if you were writing the SQL manually?  Would you right a unit test to connect to the a database and keep messing around with the SQL in your code until you got it right?  Of course not.  That would be insane!  Instead, what you would do is use a tool like SQL Developer, connect to the database, and work on the query until it runs correctly.  Then, after you've gotten the query correct, you'd copy and paste the query into your code.  You know the query works - you just ran it in SQL Developer - so no need to connect to a database from your unit test at all.  Your unit test only needs to assert that the code generates the query properly.  If you are using JPA, it's fundamentally the same thing.  The difference is with JPA you need to get the annotations correct.  So, do the JPA work somewhere else, then, when you got it correct, copy & paste it into your project and unit test the annotations."
"But where do you do this work?  Can SQL Developer help figure out JPA annotations?....Wait! I think Toad can.  Do we have more licenses for that?"
"Ugh!  No!  You create a JPA research project which starts a JPA implementation so you can play around with the JPA annotations.  In this research project, ideally you'd connect to the real project's development database, but you can actually connect to whatever database that has the data you need.  Doing all this work in a research project is actually much better for the real project because you get rid of the in-memory database from the real project and you also get rid of trying to replicate your project's real database in Derby.
"Where do we get a research project like this?"
"Umm, you just create one; Right-click -> Create -> New project." 
 "You mean everyone has to create their own research project?  Seems like a waste."
"Ugh!"
If you have had a conversation similar to this, please let me know.  I'd love to hear your stories. 

Example
But with this all being said, how do you unit test the annotations of you JPA objects.  Well it's not really that difficult.  The Java reflection API give access to a classes annotations.  So let's see what this might look like.

Suppose listing 1 is a Person object.  This Person object is part of your domain model and is setup to be handled by JPA to persist data to the database. 

Listing 1: Person and Phone Object Model
package org.thoth.jpa.UnitTesting;

import java.util.ArrayList;
import java.util.List;
import javax.persistence.Column;
import javax.persistence.Entity;
import javax.persistence.FetchType;
import javax.persistence.GeneratedValue;
import javax.persistence.Id;
import javax.persistence.OneToMany;
import javax.persistence.Table;

/**
 * (JavaCodeGeeks, 2015)
 */
@Entity
@Table(name = "T_PERSON")
  public class Person {

  private Long id;
  private String firstName;
  private String lastName;
  private List<Phone> phones = new ArrayList<>();

  @Id
  @GeneratedValue()
  public Long getId() {
    return id;
  }

  public void setId(Long id) {
    this.id = id;
  }

  @Column(name = "FIRST_NAME")
  public String getFirstName() {
    return firstName;
  }

  public void setFirstName(String firstName) {
    this.firstName = firstName;
  }

  @Column(name = "LAST_NAME")
  public String getLastName() {
    return lastName;
  }

  public void setLastName(String lastName) {
    this.lastName = lastName;
  }

  @OneToMany(mappedBy = "person", fetch = FetchType.LAZY)
  public List<Phone> getPhones() {
    return phones;
  }
}

The code in listing 1 is just an example, so it's very simple.  In real applications, the domain objects and their relationships to other objects will get complex.  But this is enough for demonstration purposes.  Now, the next thing you want to do is unit test this object. Remember, the key words are unit test. You don't want to be starting any frameworks or databases.  It's the annotations and their properties which make the Person object work properly, so that's what you want to unit test.  Listing 2 shows what a unit test for the Person object may look like.

Listing 2: PersonTest Unit Test

package org.thoth.jpa.UnitTesting;

import javax.persistence.Column;
import javax.persistence.Entity;
import javax.persistence.FetchType;
import javax.persistence.GeneratedValue;
import javax.persistence.GenerationType;
import javax.persistence.Id;
import javax.persistence.OneToMany;
import javax.persistence.Table;
import org.junit.Assert;
import org.junit.Test;

/**
 * @author Michael Remijan mjremijan@yahoo.com @mjremijan
 */
public class PersonTest {
  @Test
  public void typeAnnotations() {
    // assert
    AssertAnnotations.assertType(
        Person.class, Entity.class, Table.class);
  }


  @Test
  public void fieldAnnotations() {
    // assert
    AssertAnnotations.assertField(Person.class, "id");
    AssertAnnotations.assertField(Person.class, "firstName");
    AssertAnnotations.assertField(Person.class, "lastName");
    AssertAnnotations.assertField(Person.class, "phones");
  }


  @Test
  public void methodAnnotations() {
    // assert
    AssertAnnotations.assertMethod(
        Person.class, "getId", Id.class, GeneratedValue.class);

    AssertAnnotations.assertMethod(
        Person.class, "getFirstName", Column.class);

    AssertAnnotations.assertMethod(
        Person.class, "getLastName", Column.class);

    AssertAnnotations.assertMethod(
        Person.class, "getPhones", OneToMany.class);
  }


  @Test
  public void entity() {
    // setup
    Entity a
    = ReflectTool.getClassAnnotation(Person.class, Entity.class);

    // assert
    Assert.assertEquals("", a.name());
  }


  @Test
  public void table() {
    // setup
    Table t
    = ReflectTool.getClassAnnotation(Person.class, Table.class);

    // assert
    Assert.assertEquals("T_PERSON", t.name());
  }


  @Test
  public void id() {
    // setup
    GeneratedValue a
    = ReflectTool.getMethodAnnotation(
        Person.class, "getId", GeneratedValue.class);

    // assert
    Assert.assertEquals("", a.generator());
    Assert.assertEquals(GenerationType.AUTO, a.strategy());
  }


  @Test
  public void firstName() {
    // setup
    Column c
    = ReflectTool.getMethodAnnotation(
        Person.class, "getFirstName", Column.class);

    // assert
    Assert.assertEquals("FIRST_NAME", c.name());
  }


  @Test
  public void lastName() {
    // setup
    Column c
    = ReflectTool.getMethodAnnotation(
        Person.class, "getLastName", Column.class);

    // assert
    Assert.assertEquals("LAST_NAME", c.name());
  }


  @Test
  public void phones() {
    // setup
    OneToMany a
    = ReflectTool.getMethodAnnotation(
        Person.class, "getPhones", OneToMany.class);

    // assert
    Assert.assertEquals("person", a.mappedBy());
    Assert.assertEquals(FetchType.LAZY, a.fetch());
  }
}

For this unit test, I created a couple simple helper classes: AssertAnnotations and ReflectTool since these can obviously be reused in other tests.  AssertAnnotations and ReflectTool are shown in listing 3 and 4 respectively.  But before moving on to these helper classes, let's look at PersonTest in more detail.

Line 19 is the #typeAnnotations method.  This method asserts the annotations on the Person class itself.  Line 21 calls the #assertType method and passes Person.class as the first parameter then after that the list of annotations expected on the class.  It's important to note the #assertType method will check that the annotations passed to it are the only annotations on the class. In this case, Person.class must only have the Entity and Table annotations.  If someone adds an  annotation or removes an annotation, #assertType will throw an AssertionError.

Line 27 is the #fieldAnnotations method. This method asserts the annotations on fields of the Person class.  Lines 29-32 call the #assertField method.  The first parameter is Person.class.  The second parameter is the name of the field.  But then after that something is missing; where is the list of annotations?  Well in this case there are no annotations!  None of the fields in this class are annotated.  By passing no annotations to the #assertField method, it will check to make sure the field has no annotations.  Of course if you JPA object uses annotations on the fields instead of the getter method, then you would put in the list of expected annotations.  It's important to note the #assertField method will check that the annotations passed to it are the only annotations on the field. If someone adds an annotation or removes an annotation, #assertField will throw an AssertionError.

Line 37 is the #methodAnnotations method.  This method asserts the annotations on the getter methods of the Person class. Lines 39-49 call the #assertMethod method.  The first parameter is Person.class.  The second parameter is the name of the getter method.  The remaining parameters are the expected annotations.  It's important to note the #assertMethod method will check that the annotations passed to it are the only annotations on the getter.  If someone adds an annotation or removes an annotation, #assertMethod will throw an AssertionError.  For example, on line 40, the "getId" method must only have the Id and GeneratedValue annotations and no others.

At this point PersonTest has asserted the annotations on the class, its fields, and its getter methods.  But, annotations have values too.  For example, line 17 of the Person class is @Table(name = "T_PERSON").  The name of the table is vitally important to the correct operation of this JPA object so the unit test must make sure to check it.

Line 64 is the #table method.  It uses the ReflectTool on Line 68 to get the Table annotation from the Person class.  Then line 71 asserts the name of the table is "T_PERSON".

The rest of the unit test method in PersonTest assert the values of the annotations in the Person class.  Line 83 asserts the GeneratedValue annotation has no generator and Line 84 asserts the generation type.  Lines 96 and 108 assert the names of the database table columns.  Lines 120-121 assert the relationship type between the Person object and the Phone object.

After looking at PersonTest in more detail, let's look at help classes: AssertAnnotations and ReflectTool.  I'm not going to say anything about these classes; they aren't all that complicated.

Listing 3: AssertAnnotations helper

package org.thoth.jpa.UnitTesting;

import java.lang.annotation.Annotation;
import java.util.Arrays;
import java.util.List;

/**
 * @author Michael Remijan mjremijan@yahoo.com @mjremijan
 */
public class AssertAnnotations {
  private static void assertAnnotations(
      List<Class> annotationClasses, List<Annotation> annotations) {
    // length
    if (annotationClasses.size() != annotations.size()) {
      throw new AssertionError(
        String.format("Expected %d annotations, but found %d"
          , annotationClasses.size(), annotations.size()
      ));
    }

    // exists
    annotationClasses.forEach(
      ac -> {
        long cnt
          = annotations.stream()
            .filter(a -> a.annotationType().isAssignableFrom(ac))
            .count();
        if (cnt == 0) {
          throw new AssertionError(
            String.format("No annotation of type %s found", ac.getName())
          );
        }
      }
    );
  }


  public static void assertType(Class c, Class... annotationClasses) {
    assertAnnotations(
        Arrays.asList(annotationClasses)
      , Arrays.asList(c.getAnnotations())
    );
  }


  public static void assertField(
      Class c, String fieldName, Class... annotationClasses) {
    try {
      assertAnnotations(
        Arrays.asList(annotationClasses)
        , Arrays.asList(c.getDeclaredField(fieldName).getAnnotations())
      );
    } catch (NoSuchFieldException nsfe) {
      throw new AssertionError(nsfe);
    }
  }


  public static void assertMethod(
      Class c, String getterName, Class...annotationClasses) {
    try {
      assertAnnotations(
        Arrays.asList(annotationClasses)
        , Arrays.asList(c.getDeclaredMethod(getterName).getAnnotations())
      );
    } catch (NoSuchMethodException nsfe) {
      throw new AssertionError(nsfe);
    }
  }
}

Listing 4: ReflectTool helper

package org.thoth.jpa.UnitTesting;

import java.lang.annotation.Annotation;
import java.lang.reflect.Field;
import java.lang.reflect.Method;

/**
 * @author Michael Remijan mjremijan@yahoo.com @mjremijan
 */
public class ReflectTool {
  public static <T extends Annotation> T getMethodAnnotation(
      Class<?> c, String methodName, Class<T> annotation) {
    try {
      Method m = c.getDeclaredMethod(methodName);
      return (T)m.getAnnotation(annotation);
    } catch (NoSuchMethodException nsme) {
      throw new RuntimeException(nsme);
    }
  }

  public static <T extends Annotation> T getFieldAnnotation(
      Class<?> c, String fieldName, Class<T> annotation) {
    try {
      Field f = c.getDeclaredField(fieldName);
      return (T)f.getAnnotation(annotation);
    } catch (NoSuchFieldException nsme) {
      throw new RuntimeException(nsme);
    }
  }

  public static <T extends Annotation> T getClassAnnotation(
      Class<?> c, Class<T> annotation) {
    return (T) c.getAnnotation(annotation);
  }
}

That's it.  I hope this is helpful.

References
https://www.javacodegeeks.com/2015/02/jpa-tutorial.html#relationships_onetomany