Are you using Jacoco to give you statistics on the unit test coverage of your source code? Have you encountered a problem where jacoco.exe is not created by jacoco-maven-plugin?. Then keep reading, I’ve got your answer.
Disclaimer
This post is solely informative. Critically think before using any information presented. Learn from it but ultimately make your own decisions at your own risk.
Requirements
I did all of the work for this post using the following major technologies. You may be able to do the same thing with different technologies or versions, but no guarantees.
Java 1.8.0_65_x64
jacoco-maven-plugin 0.7.5.201505241946
maven-surefire-plugin 2.17
Maven 3.0.5 (Bundled with NetBeans)
Where are your tests?
Does your project even have unit tests? You sure? Take a look! If your project doesn’t have any unit tests, then jacoco.exe is not created. I’m sure your project already has unit tests, but, it’s always good to check that the lamp is plugged in first :). Now let’s get to a more interesting reason why jacoco.exe is not being created: <argLine>.
Watch out for <argLine>
If you have been using Jacoco and suddenly the jacoco.exe is not created, then chances are you have an <argLine> problem. Jacoco connects itself to the surefire plugin by editing the <argLine> value of that plugin. If you don’t set <argLine> then you’re fine. But if you do, you’ll mess up Jacoco if you don’t do it properly.
Let’s take a look at how NOT to do it. The <properties> tag is typically used to configure plugins and Listing 1 shows you what NOT to do.
Listing 1 - Don’t use <properties> to configure plugins
<properties>
  <!-- Do not configure plugin with properties -->
  <surefire.plugin.argline>-XX:PermSize=256m -XX:MaxPermSize=1048m</surefire.plugin.argline>
</properties>
Instead, configure <argLine> in the plugin itself, and include in the configuration the assumption that Jacoco has already set the <argLine> value. Listing 2 shows how to properly configure Surefire.
Listing 2 - Prepend Jacoco’s argLine value to your value
This may look a little funny - <argLine>${argLine} -XX:PermSize=256m -XX:MaxPermSize=1048m</argLine> - but this is really nothing more than string concatenation. The Jacoco plugin automatically sets the value argLine. So if you need to set its value too, you use a standard variable reference to ${argLine} to prepend Jacoco’s value to your value. Finally, Listing 3 shows a very basic jacoco-maven-plugin configuration.
In listing 3, you can see the prepare-agent goal is configured to be executed at the initialize phase of the Maven life cycle. This goal is what sets the <argLine> value. Then, when the Surefire plugin runs, the jacoco.exe file gets created correctly and the unit test statistics are collected.
Summary
If jacoco.exe is not being created for you, the <argline> value is moste likely your problem. Remove any <properties> that set the argline value and configure <argLine> in the plugin itself. When you do so, remember to include Jacoco’s value by prepending the value like <argLine>${argLine} -XX:PermSize=256m -XX:MaxPermSize=1048m</argLine>.
Recently, I was doing some research into JAX-RS and ran into a problem. I attempted to use CDI to @Inject a bean into the JAX-RS resource. It failed miserably. Different attempts produced different failures. Sometimes exceptions occurred during deployment, other times exceptions occurred when invoking the JAX-RS endpoint. After much trial and error, and some asking on Stackoverflow, I found 2 solution. This post describes these 2 solutions to get CDI and JAX-RS working together.
Requirements
I did all of the work for this post using the following major technologies. You may be able to do the same thing with different technologies or versions, but no guarantees.
Java EE 7
Payara 4.1.1.161
Java 1.8.0_65_x64
NetBeans 8.1
Maven 3.0.5 (Bundled with NetBeans)
Downloads
All of the research & development work I did for this post is available on my GitHub account. Feel free to download or clone the thoth-jaxrs GitHub project.
Exceptions
As soon as I tried to use CDI to @Inject a bean into a JAX-RS @Path resource, my application ran into trouble. I tried resolving the trouble in a lot of different ways but I kept getting either deployment exceptions or runtime exceptions. For reference, here are the exceptions I was typically getting.
Deployment Exception
The deployment exception obviously happened at deployment time. When these happened, the application failed to deploy.
Exception during lifecycle processing
java.lang.Exception: java.lang.IllegalStateException: ContainerBase.addChild: start: org.apache.catalina.LifecycleException: org.apache.catalina.LifecycleException: org.jboss.weld.exceptions.DeploymentException: WELD-001408: Unsatisfied dependencies for type InjectMe with qualifiers @Default at injection point [BackedAnnotatedField] @Inject private org.thoth.jaspic.web.InjectResource.me
Runtime Exception
The runtime exception happened when attempting to invoke the JAX-RS resource with a browser. For this exception, the application deployed without errors, but this one JAX-RS resource wasn’t working.
MultiException stack 1 of 1
org.glassfish.hk2.api.UnsatisfiedDependencyException: There was no object available for injection at SystemInjecteeImpl(requiredType=InjectMe, parent=InjectResource, qualifiers={}, position=-1, optional=false, self=false, unqualified=null, 1000687916))
Resolution 1: beans.xml
This is the first resolution I found. The key factor was adding a beans.xml file to the web project and configuring beans.xml with bean-discovery-mode="all". This allows CDI to consider all classes for injection. This is not a preferred solution however. For reference, here are all the major files in the project.
import java.io.Serializable;
public class InjectMe implements Serializable {
private static final long serialVersionUID = 158775545474L;
private String foo;
public String getFoo() {
return foo;
}
public void setFoo(String foo) {
this.foo = foo;
}
}
Resolution 2: Scope Annotations
The second resolution - and the preferred solution - is to annotate the classes with scope annotations. The key factor here is to annotate both the JAX-RS @Path resource and the bean to inject with a scope annotation. This then works with the CDI default discovery mode which is ‘annotated’. Because both these classes are annotated with scope annotations, CDI will automatically discover them without the need for a beans.xml file. And this is important because we want to avoid having a beans.xml if possible and configure the application with only annotations. For reference, here are all the major files in the project. In this example, both are annotated with @RequestScope which makes them discoverable to CDI.
NOTE
Thanks to “leet java” and “OndrejM” for responding to my Stackoverflow question. I mistakenly assumed the @Path annotation made a class discoverable by CDI and they pointed that out to me, thanks!.
JAX-RS Application Configuration
import javax.ws.rs.core.Application;

@javax.ws.rs.ApplicationPath("webresources")
public class ApplicationConfig extends Application {

}
import java.io.Serializable;
import javax.enterprise.context.RequestScoped;

@RequestScoped
public class InjectMe implements Serializable {

    private static final long serialVersionUID = 158775545474L;

    private String foo;

    public String getFoo() {
        return foo;
    }
    public void setFoo(String foo) {
        this.foo = foo;
    }
}
Summary
This problem and its eventual solution may seem trivial. However, when using tools (like NetBeans) to automatically generate your projects it’s easy to forget about things like annotations and beans.xml files since so much code is generated for you. So hopefully this will help you save some time if you run into this problem.
So you use WebLogic. You also have continuous integration running (Bamboo, Jenkins, etc.) It would be nice to incorporate continuous deployments, and have deployments automated too. But how do you automate deployments from your CI build servers to your WebLogic servers? You may think, there’s a Maven plugin for that, and you’d be right! You might also think, “I can search Maven central, find the latest version of the plugin, and drop it into my POM.” If you have this thought, you’d be wrong! A Maven plugin does exist, but it’s unlike any Maven artifact you’ve ever used. This article describes in detail how to use weblogic-maven-plugin for continuous deployments. To do this, you’ll need to perform the following steps:
Download, install, and configure WebLogic
Create a WebLogic domain, which also automatically creates an admin server for the domain.
Install the WebLogic crypto libraries into your Maven repository
Generate the WebLogic config/key files and install them into your Maven repository
Generate the WebLogic weblogic-maven-plugin.jar file and install it into your Maven repository.
Add all the configuration to your project’s pom.xml to get weblogic-maven-plugin working.
Requirements
These are the version of the major pieces of software I used. No guarantees this will work if you use different versions.
WebLogic 10.3.6
Java 1.6.0_23
Maven 3.0.5
NOTE
This article describes how to generate weblogic-maven-plugin using WebLogic 10.3.6. This plugin will work with 10.3.x version of WebLogic but the plugin has also successfully worked with WebLogic 12.1.3.
WebLogic
Download
Download WebLogic from the Oracle WebLogic Server Installers page. There are many different versions and file formats available to download. This article uses the ZIP format of version 10.3.6. So make sure you download the following:
Version 10.3.6
The Zip distribution named “- Zip distribution for Mac OSX, Windows, and Linux (183 MB)”
NOTE
You will need an Oracle account to download.
After you have downloaded the ZIP file, you’ll need to unzip it. Unzipping is a piece of cake right? Not so fast. There can be a number of problems unzipping this file. Let’s take a look at unzipping next.
Unzip
Unzipping the WebLogic ZIP distribution can be a bit of a challenge. Both WinZip and 7-Zip gave errors on Windows. So you are better off using the Java jar command to unzip the file. Let’s do that now.
When you are done, the wls1036 directory will look like this:
C:\Applications\wls1036>dir
 Volume in drive C is OS

 Directory of c:\Applications\wls1036

08/09/2016  10:51 AM    <DIR>          .
08/09/2016  10:51 AM    <DIR>          ..
11/15/2011  11:23 AM             1,421 configure.cmd
11/15/2011  11:23 AM             1,370 configure.sh
11/15/2011  11:23 AM             3,189 configure.xml
11/15/2011  11:23 AM               133 domain-registry.xml
11/15/2011  11:23 AM    <DIR>          modules
11/15/2011  11:23 AM             5,765 README.txt
11/15/2011  11:23 AM             1,138 registry.template
11/15/2011  11:23 AM    <DIR>          utils
11/15/2011  11:23 AM    <DIR>          wlserver
               6 File(s)         13,016 bytes
               5 Dir(s)  60,949,000,192 bytes free
Now that WebLogic has been unzipped, let’s look at its configuration next.
Configure
Simply execute configure.cmd that comes with WebLogic.
NOTE
If you are prompted to create a new domain, DO NOT do so.
When you are done, the mydomain directory will look like this:
C:\Domains\mydomain>dir
 Volume in drive C is OS

 Directory of C:\Domains\mydomain

08/09/2016  11:21 AM    <DIR>          .
08/09/2016  11:21 AM    <DIR>          ..
08/09/2016  11:21 AM    <DIR>          autodeploy
08/09/2016  11:21 AM    <DIR>          bin
08/09/2016  11:21 AM    <DIR>          config
08/09/2016  11:21 AM    <DIR>          console-ext
08/09/2016  11:21 AM               472 fileRealm.properties
08/09/2016  11:21 AM    <DIR>          init-info
08/09/2016  11:21 AM    <DIR>          lib
08/09/2016  11:21 AM    <DIR>          security
08/09/2016  11:17 AM    <DIR>          servers
08/09/2016  11:21 AM               283 startWebLogic.cmd
08/09/2016  11:21 AM               235 startWebLogic.sh
               3 File(s)            990 bytes
              10 Dir(s)  60,934,422,528 bytes free
Now that you have successfully created a domain, you can start the WebLogic admin server and use the console to administer the domain. Let’s take a look at that next.
Startup
Once WebLogic has been configured and a domain created, you can start the WebLogic admin server and login to the console. But first there’s a bug you have to deal with.
Fix WebLogic Bug
For some reason, when WebLogic creates the domain, the scripts it generates to start the domain fail to set the %MW_HOME% environment variable. So this is what you need to do.
Open C:\Domains\mydomain\startWebLogic.cmd in your favorite text editor
Add this line: set MW_HOME=C:\Applications\wls1036
Now you should be able to start the admin server for the domain.
Browse to the admin console, http://localhost:7001/console, and login with the simple credentials (mydomain/mydomain1) you set when you ran the command to create the domain.
Now that WebLogic is installed, configured, and up and running, let’s start generating the artifacts weblogic-maven-plugin will need, including the plugin itself. We’ll start with something easy, the crypto library.
Crypto Library
In order to automate deployments to WebLogic, at some point you will need to know the admin username and password for the WebLogic admin console. The weblogic-maven-plugin can be configured with a clear-text username and password, but that’s not a good idea. An alternative is to generate a key pair. The key pair allows access without the need for a clear-text password. When WebLogic generates this key pair, the data in the files are encrypted. The weblogic-maven-plugin will need the crypto library in order to decrypt. So, let’s get the crypto library into your Maven repository.
Install
The file we want to install in your Maven repository is C:\Applications\wls1036\modules\cryptoj.jar. The easiest way to do it is to use the mvn install:install-file command to put it into your Maven repository.
Check your .m2\repositories directory afterwords to verify it was installed successfully. Now we have the ability to decrypt data in key pair files. So the next thing to do is generate them.
Key Pair Files
To login to the WebLogic admin (web-based) console, you need to know the admin username and password. But the admin console is not the only way you can administer a WebLogic domain. WebLogic also has the WebLogic Scripting Tool (WLST), which is a command-line interface for administering a domain. Command-line interfaces are nice because they allow you to script your configuration process. But, an admin username and password are still needed when using the WLST. You can hard code clear-text usernames and passwords in scripts, but auditors and security teams don’t like that very much. As an alternative, WebLogic can generate encrypted config/key files. So, what we are going to look at next is:
Generating the config/key files for a WebLogic domain
Testing the the files (got to make sure they work before we try to use them for real)
Installing the config/key files into a Maven repository (this isn’t technically necessary, but, it’s really nice when it comes to automating deployments. You’ll see this later)
Fix WebLogic Bug
Before you can proceed with generating the WebLogic config/key files, first you need to fix a WebLogic bug. The easiest way to execute WLST is to use the C:\Applications\wls1036\wlserver\common\bin\wlst.cmd command. However, for some reason this file is completely empty! If you find yourself with an empty wlst.cmd file, here are its contents.
@ECHO OFF
SETLOCAL

SET MW_HOME=C:\Applications\wls1036
SET WL_HOME=%MW_HOME%\wlserver
CALL "%WL_HOME%\server\bin\setWLSEnv.cmd"

if NOT "%WLST_HOME%"=="" (
    SET WLST_PROPERTIES=-Dweblogic.wlstHome=%WLST_HOME% %WLST_PROPERTIES%
)

SET CLASSPATH=%CLASSPATH%;%FMWLAUNCH_CLASSPATH%;%DERBY_CLASSPATH%;%DERBY_TOOLS%;%POINTBASE_CLASSPATH%;%POINTBASE_TOOLS%

@echo.
@echo CLASSPATH=%CLASSPATH%

SET JVM_ARGS=-Dprod.props.file="%WL_HOME%\.product.properties" %WLST_PROPERTIES% %MEM_ARGS% %CONFIG_JVM_ARGS%

"%JAVA_HOME%\bin\java" %JVM_ARGS% weblogic.WLST %*
Now, let’s generate some config/key files!
Generate
Generating the config/key files is done with a few commands. The hardest part of running these commands is determining the correct values to pass to connect(). In the example below, localhost is used because this example was created using a personal laptop. On servers, especially VMs or machines with multiple network cards, you need to know what network interface WebLogic bound to when the admin server started. Typically, if you take the URL you use to browse to the admin console - http://localhost:7001/console - and edit it for WLST - t3://localhost:7001 - you’ll be OK. Let’s take a look at the commands.
Now that you have the config/key files generated, let’s test them to make sure they work. It is always a good idea to test any key pair you generate for a domain before trying to use them in automated scripts. It makes troubleshooting issues easier.
Test
Test the config/key file by using the weblogic.Deployer application to get a list of all the applications deployed to the WebLogic domain. To do this, execute the following commands:
NOTE
Make sure your WebLogic admin server is running before you try to test the config/key files.
After executing the weblogic.Deployer application, the output will look similar to this:
weblogic.Deployer invoked with options:  -adminurl t3://localhost:7001 -userconfigfile C:\Users\Michael\Desktop\wls.config -userkeyfile C:\Users\Michael\Desktop\wls.key -listapps
There is no application to list.

C:\>
If you get this, congratulations! Your config/key files are working. Now let’s get these config/key files into your Maven repository. This will be similar to what you did for the crypto library. Let’s take a look.
Install
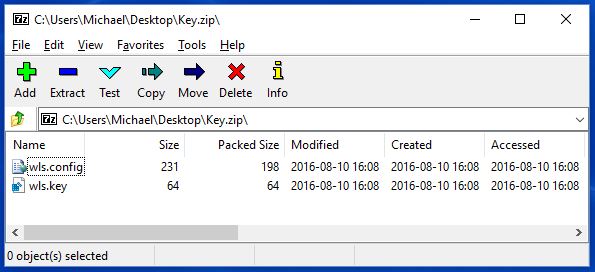
Let’s assume the config/key files are on your Desktop. To install them in your Maven repository the first thing you need to do is ZIP them up. The ZIP archive should look like figure 1.
Figure 1 - Zip archive of config/key files
Zip archive of config/key files
After the ZIP file is created, use the use the mvn install:install-file command to put it into your computer’s local repository.
-DgroupId and -DartifactId. The values for -DgroupId and -DartifactId are largely a detail up to you. When setting these values, keep in mind that you will be generating keys for every WebLogic domain that will be targets of automated deployments. So it’s a good idea to keep the values for -DgroupId and -DartifactId such that it’s easy to distinguish the environment and domain the keys are for.
-Dpackaging=zip. Don’t skip this value and note it’s value is zip. The majority of the time JAR files are put into a Maven repository, but this artifact is a ZIP.
NOTE
Yes, I know that a JAR file and ZIP file are the same file format.
Check your .m2\repositories directory afterwords to verify it was installed successfully. With the key pair in the Maven repository, what’s next to do is to generate the weblogic-maven-plugin itself. Let’s do it.
Plugin JAR
At this point, you have installed the crypto libraries into your Maven repository (essential for decrypting the WebLogic config/key files) and you have generated the WebLogic config/key files (essential for eliminating clear-text usernames and passwords) and have also installed both of them into your Maven repository. Now let’s generate the plugin itself.
Generate
To generate weblogic-maven-plugin use the wljarbuilder tool and configure it to build the plugin. This tool comes with WebLogic and is located in wlserver\server\lib directory. Here are the commands to generate the plugin.
This will run for a while. While it’s running, it will build an uber weblogic-maven-plugin.jar file. That’s it! That’s the plugin. Not too exciting is it? Well now you need to install the weblogic-maven-plugin.jar file into your Maven repository. That will be a little more exciting.
Install
Installing weblogic-maven-plugin into your Maven repository is pretty much the same as installing any other artifact. However, to make using the plugin easier, you need to update the plugin’s POM file before installing the plugin. Let’s do it.
Extract POM. Use the Java jar tool to extract the pom.xml file from weblogic-maven-plugin.jar. When you execute this command, the pom.xml file will be extracted in the same directory as weblogic-maven-plugin.jar.
Update POM. Now you want to update pom.xml and add a dependency on the crypto library. Remember, you installed the crypto library into the Maven repository earlier. Doing this makes weblogic-maven-plugin easier to use because Maven will automatically pull the crypto library out of the repository when the plugin needs to decrypt the WebLogic config/key files. Use your favorite text editor to open the C:\Applications\wls1036\wlserver\server\lib\META-INF\maven\com.oracle.weblogic\weblogic-maven-plugin\pom.xml file. Below you’ll see a piece of XML surrounded by the <!-- BEGIN --> and <!-- END --> comments. Copy what’s between these comments into your pom.xml.
<project xmlns="http://maven.apache.org/POM/4.0.0"
  xmlns:xsi="http://www.w3.org/2001/XMLSchema-instance"
  xsi:schemaLocation="http://maven.apache.org/POM/4.0.0 http://maven.apache.org/maven-v4_0_0.xsd">
  <modelVersion>4.0.0</modelVersion>
  <groupId>com.oracle.weblogic</groupId>
  <artifactId>weblogic-maven-plugin</artifactId>
  <packaging>maven-plugin</packaging>
  <version>10.3.6.0</version>
  <name>Maven Mojo Archetype</name>
  <url>http://maven.apache.org</url>
  <dependencies>
    <dependency>
      <groupId>org.apache.maven</groupId>
      <artifactId>maven-plugin-api</artifactId>
      <version>2.0</version>
    </dependency>
    <!-- ADD THIS DEPENDENCY TO YOUR pom.xml -->
    <!-- BEGIN -->
    <dependency>
      <groupId>com.oracle.cryptoj</groupId>
      <artifactId>cryptoj</artifactId>
      <version>1.0.0.0</version>
    </dependency>
    <!-- END -->
  </dependencies>
</project>
Install-file. After you have finished editing the pom.xml file, you are now ready to use the mvn install:install-file command to put the weblogic-maven-plugin.jar file into your Maven repository.
Check your .m2\repositories directory afterwords to verify it was installed successfully. Now that the crypto library, the WebLogic config/key files, and the plugin are in the Maven repository, it’s time to update your project’s pom.xml to automatically deploy to WebLogic.
Project POM
After installing the crypto library into your Maven repository, generating the WebLogic config/key files and installing them into your Maven repository, and generating the weblogic-maven-plugin.jar file and installing it into your Maven repository, you are now finally ready to configure your application for automated deployment to WebLogic. You will need to edit your project’s pom.xml and add the following pieces:
A <profile> for deployment
A <plugin> to extract the WebLogic config/key files
A <plugin> to deploy to WebLogic
So let’s look at this configuration and see how all of these pieces fit together to automatically deploy your artifact to WebLogic.
Add to pom.xml
Here is an example showing what you need to add to your project’s pom.xml file. This example brings together everything you have generated and configured. Let’s take a look at this in more detail.
<profiles>
  <profile>
    <!-- PROFILE SPECIFICALLY FOR DEPLOYING TO LOCALHOST -->
    <!-- ADD ADDITIONAL PROFILES FOR DIFFERENT ENVIRONMENTS -->
    <id>deploy-localhost</id>

    <!-- DEPENDENCY ON THE **LOCALHOST** CONFIG/KEY FILES -->
    <!-- DIFFERENT ENVIRONMENTS WILL HAVE THEIR OWN CONFIG/KEY FILES -->
    <dependencies>
      <dependency>
        <groupId>com.oracle.weblogic.keys</groupId>
        <artifactId>localhost</artifactId>
        <version>1.0.0.0</version>
        <type>zip</type>
        <scope>provided</scope>
      </dependency>
    </dependencies>

    <build>
      <plugins>

        <!-- UNPACK CONFIG/KEY FILES TO ./target/keys DIRECTORY -->
        <plugin>
          <groupId>org.apache.maven.plugins</groupId>
          <artifactId>maven-dependency-plugin</artifactId>
          <version>2.6</version>
          <executions>
            <execution>
              <id>unpack-dependencies</id>
              <phase>prepare-package</phase>
              <goals>
                <goal>unpack-dependencies</goal>
              </goals>
              <configuration>
                <includeArtifactIds>localhost</includeArtifactIds>
                <outputDirectory>
                  ${project.build.directory}/keys
                </outputDirectory>
              </configuration>
            </execution>
          </executions>
        </plugin>

        <!-- DEPLOY WAR TO "myserver" ON WEBLOGIC DOMAIN -->
        <plugin>
          <groupId>com.oracle.weblogic</groupId>
          <artifactId>weblogic-maven-plugin</artifactId>
          <version>10.3.6.0</version>
          <configuration>
            <adminurl>t3://localhost:7001</adminurl>
            <targets>myserver</targets>
            <userConfigFile>${project.build.directory}/keys/wls.config</userConfigFile>
            <userKeyFile>${project.build.directory}/keys/wls.key</userKeyFile>
            <upload>true</upload>
            <action>deploy</action>
            <remote>false</remote>
            <verbose>true</verbose>
            <source>
              ${project.build.directory}/${project.build.finalName}.${project.packaging}
            </source>
            <name>${project.build.finalName}</name>
          </configuration>
          <executions>
            <execution>
              <phase>install</phase>
              <goals>
                <goal>deploy</goal>
              </goals>
            </execution>
          </executions>
        </plugin>
      </plugins>
    </build>
  </profile>
</profiles>
Create a <profile> for an environment. A <profile> is created with the value <id>deploy-localhost</id>. This <id> value makes it clear this profile is for localhost deployment. Each environment gets its own profile.
Configure <dependency> on the config/key files. This <dependency> is within the <profile> and that’s on purpose! The <dependency> belongs in the <profile> because:
The config/key files are only needed for deployment
The config/key files are unique to each environment
You can put the <dependency> at the project level, but if you do that it may end up being packaged with your artifact. This doesn’t make any sense to do because this <dependency> is only used for automated deployments.
Configure config/key <plugin>. Here you use maven-dependency-plugin and its unpack-dependencies goal. Remember, the config/key files are in the Maven repository as a ZIP artifact, but you need to get at the individual files inside the ZIP artifact. Using the maven-dependency-plugin and its unpack-dependencies goal will do this for you. The maven-dependency-plugin will unzip the files to <outputDirectory>, which in this example is the target/keys directory.
Now you might ask, “Why not just put the config/key files somewhere on the file system? Why go through the extra effort to get them out of the Maven repository?” The answer is that it’s actually much less effort getting it from the Maven repository, and here’s why. It’s automated! Once the keys are in the Maven repository and your project’s pom.xml file is configured, everything is completely automated after that. No need to have any extra manual steps on any machine that will be running the automated deploys. How cool is that!
Configure deployment <plugin>. You’ve finally gotten to configuring weblogic-maven-plugin itself. Bet you were never going to get here, huh? Anyway, the configuration is fairly trivial. The <adminurl>t3://localhost:7001</adminurl> value is exactly the same used by WLST in the “Key Pair Files” section. The <targets>myserver</targets> value is a comma-separated list of the names of the servers on that WebLogic domain you want to deploy to. The <userConfigFile> and <userKeyFile> point to the config/key files that are automatically pulled out of the Maven repository and unzipped for you by maven-dependency-plugin. The <source> value is the artifact your project built, typically a WAR like .\target\helloworld-1.0.0.0.war. Finally, the <name> value is the name given to the deployment inside of WebLogic. This value is important because if the plugin finds something deployed to WebLogic that has the same name, it will be replaced. This is typically what you want to do, because the whole point of automating deployments is replace what’s out there with the latest and greatest version.
That’s it! If you run your project and see what happens.
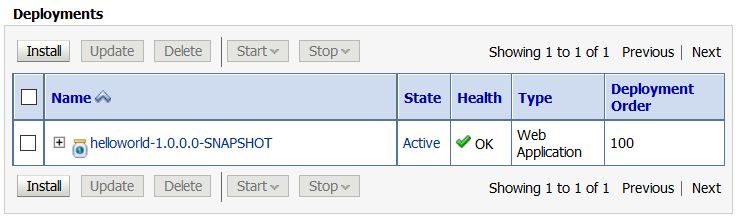
If you login to the WebLogic admin console and browse to the deployments, you’ll see your application listed. Figure 2 shows an example.
Figure 2 - Deployments screenshot
Deployments screenshot
Summary
It took a while to get here, but you finally made it. Let’s quickly review. The goal is to automate deployments to WebLogic using the weblogic-maven-plugin. To achieve this goal, you must:
Download, install, and configure WebLogic
Create a WebLogic domain, which also automatically creates an admin server for the domain.
Install the WebLogic crypto libraries into your Maven repository
Generate the WebLogic config/key files and install them into your Maven repository
Generate the WebLogic weblogic-maven-plugin.jar file and install it into your Maven repository.
Fix a few WebLogic bugs along the way :)
Add all the configuration to your project’s pom.xml to get the weblogic-maven-plugin working.
It’s all a little exhausting, but once it’s done the benefits of having automated deploys is well worth it.